
Lately, I’ve been sitting at my kitchen table and working a lot. It is summer in Ann Arbor and the cherries and berries are coming into season. The birds around the house have been going nuts lately and I love to hear them chattering during the day. I wanted to see if I could build a simple bird call recognition system with Python. The idea is that I would have a script that runs and when it detects audio that might be a bird call it would record it and match it against a data set. Maybe if it got half-way decent I would have it tweet the birds and their songs when they happened. The first step in the process was to try and record chunks of live audio off of my laptop microphone. Once I have the chunks I process them to see if there is a bird sound, and if so what bird it might be coming from. To do the recording, and display the wave form I clobbered together bits and pieces from numpy, pyaudio, and matplotlib. It took all of an hour to get a working prototype. To test it I played some sounds from the Cornell Lab of Ornithology. The Cornell website is a fantastic resource and I hope to scrape the MacCaulay Library page to build my data set.
Learning Bird Calls with Python
June 28th, 2013 | Posted by in Uncategorized - (Comments Off on Learning Bird Calls with Python)Transcontinental Express
May 31st, 2013 | Posted by in Education | Fun! | Ideas | Inspiration | Michigan | New York | RaspberryPi - (Comments Off on Transcontinental Express)Recently I found myself with a couple months of time off. I decided to use it in the most productive manner I could think of so I booked a one month rail pass on Amtrak. I already had plans to go to Ada Camp in San Francisco and my sister’s high school graduation in Mechanicsville, Virginia. At $670 the rail pass was cheaper than plane tickets and I got to see most of the country. Tentatively I plan to visit Portland, San Francisco/Silicon Valley/Oakland, Iowa City, Richmond Virginia, and New York City. I was able to schedule my trip so I could take the Empire Builder line, the California Zephyr, and a good chunk of the Coast Starlight. My tentative schedule is below.
View Transcontinental Express in a larger map
My exact schedule for the first leg of the trip can be found here. Packing for this trip has been a little crazy. I want to squeeze everything I need into a back pack, but train travel is tough as traveling in coach requires that you bring a lot of necessities (and entertainment).

Try squeezing a month’s worth of clothes, electronics, supplies, and food into a backpack!
I purchased a Nexus 7 tablet for the journey and I have a tupperware container with a raspberry pi, arduino, makey-makey, breadboard, and various component to keep me entertained on the train. The transcontinental trips are almost three whole days so I should have lots of time to read, code, and build cool stuff with my fellow travelers. Hopefully I will post some cool stuff from the road, and have 4G coverage for most of the trip.
My home for the next month.
FIRST 830 Vortex Cannon
May 31st, 2013 | Posted by in Ann Arbor | FIRST | Maker Works | RaspberryPi | robots - (Comments Off on FIRST 830 Vortex Cannon)
Commercial vortex cannon from last year’s robot.
FRC Team 830 along with FRC Team 3322 are working on a show robot for the Detroit Maker Fair. Maker Works was even cool enough to give us a small grant to fab the robot! The working concept is a life-size animatronic dragon that shoots smoke rings. With my ample free time I’ve been figuring out how to make it happen using a combination of the standard cRIO FIRST platform and raspberry pi’s. Last’s year’s robot used a vortex cannon to knock over pac-man ghosts, but this year we wanted to go bigger. We are using the drive train from last year’s robot for the new dragon bot so we should have a lot more time to build cool animatronic stuff.
Hole in the bottom of the garbage can.
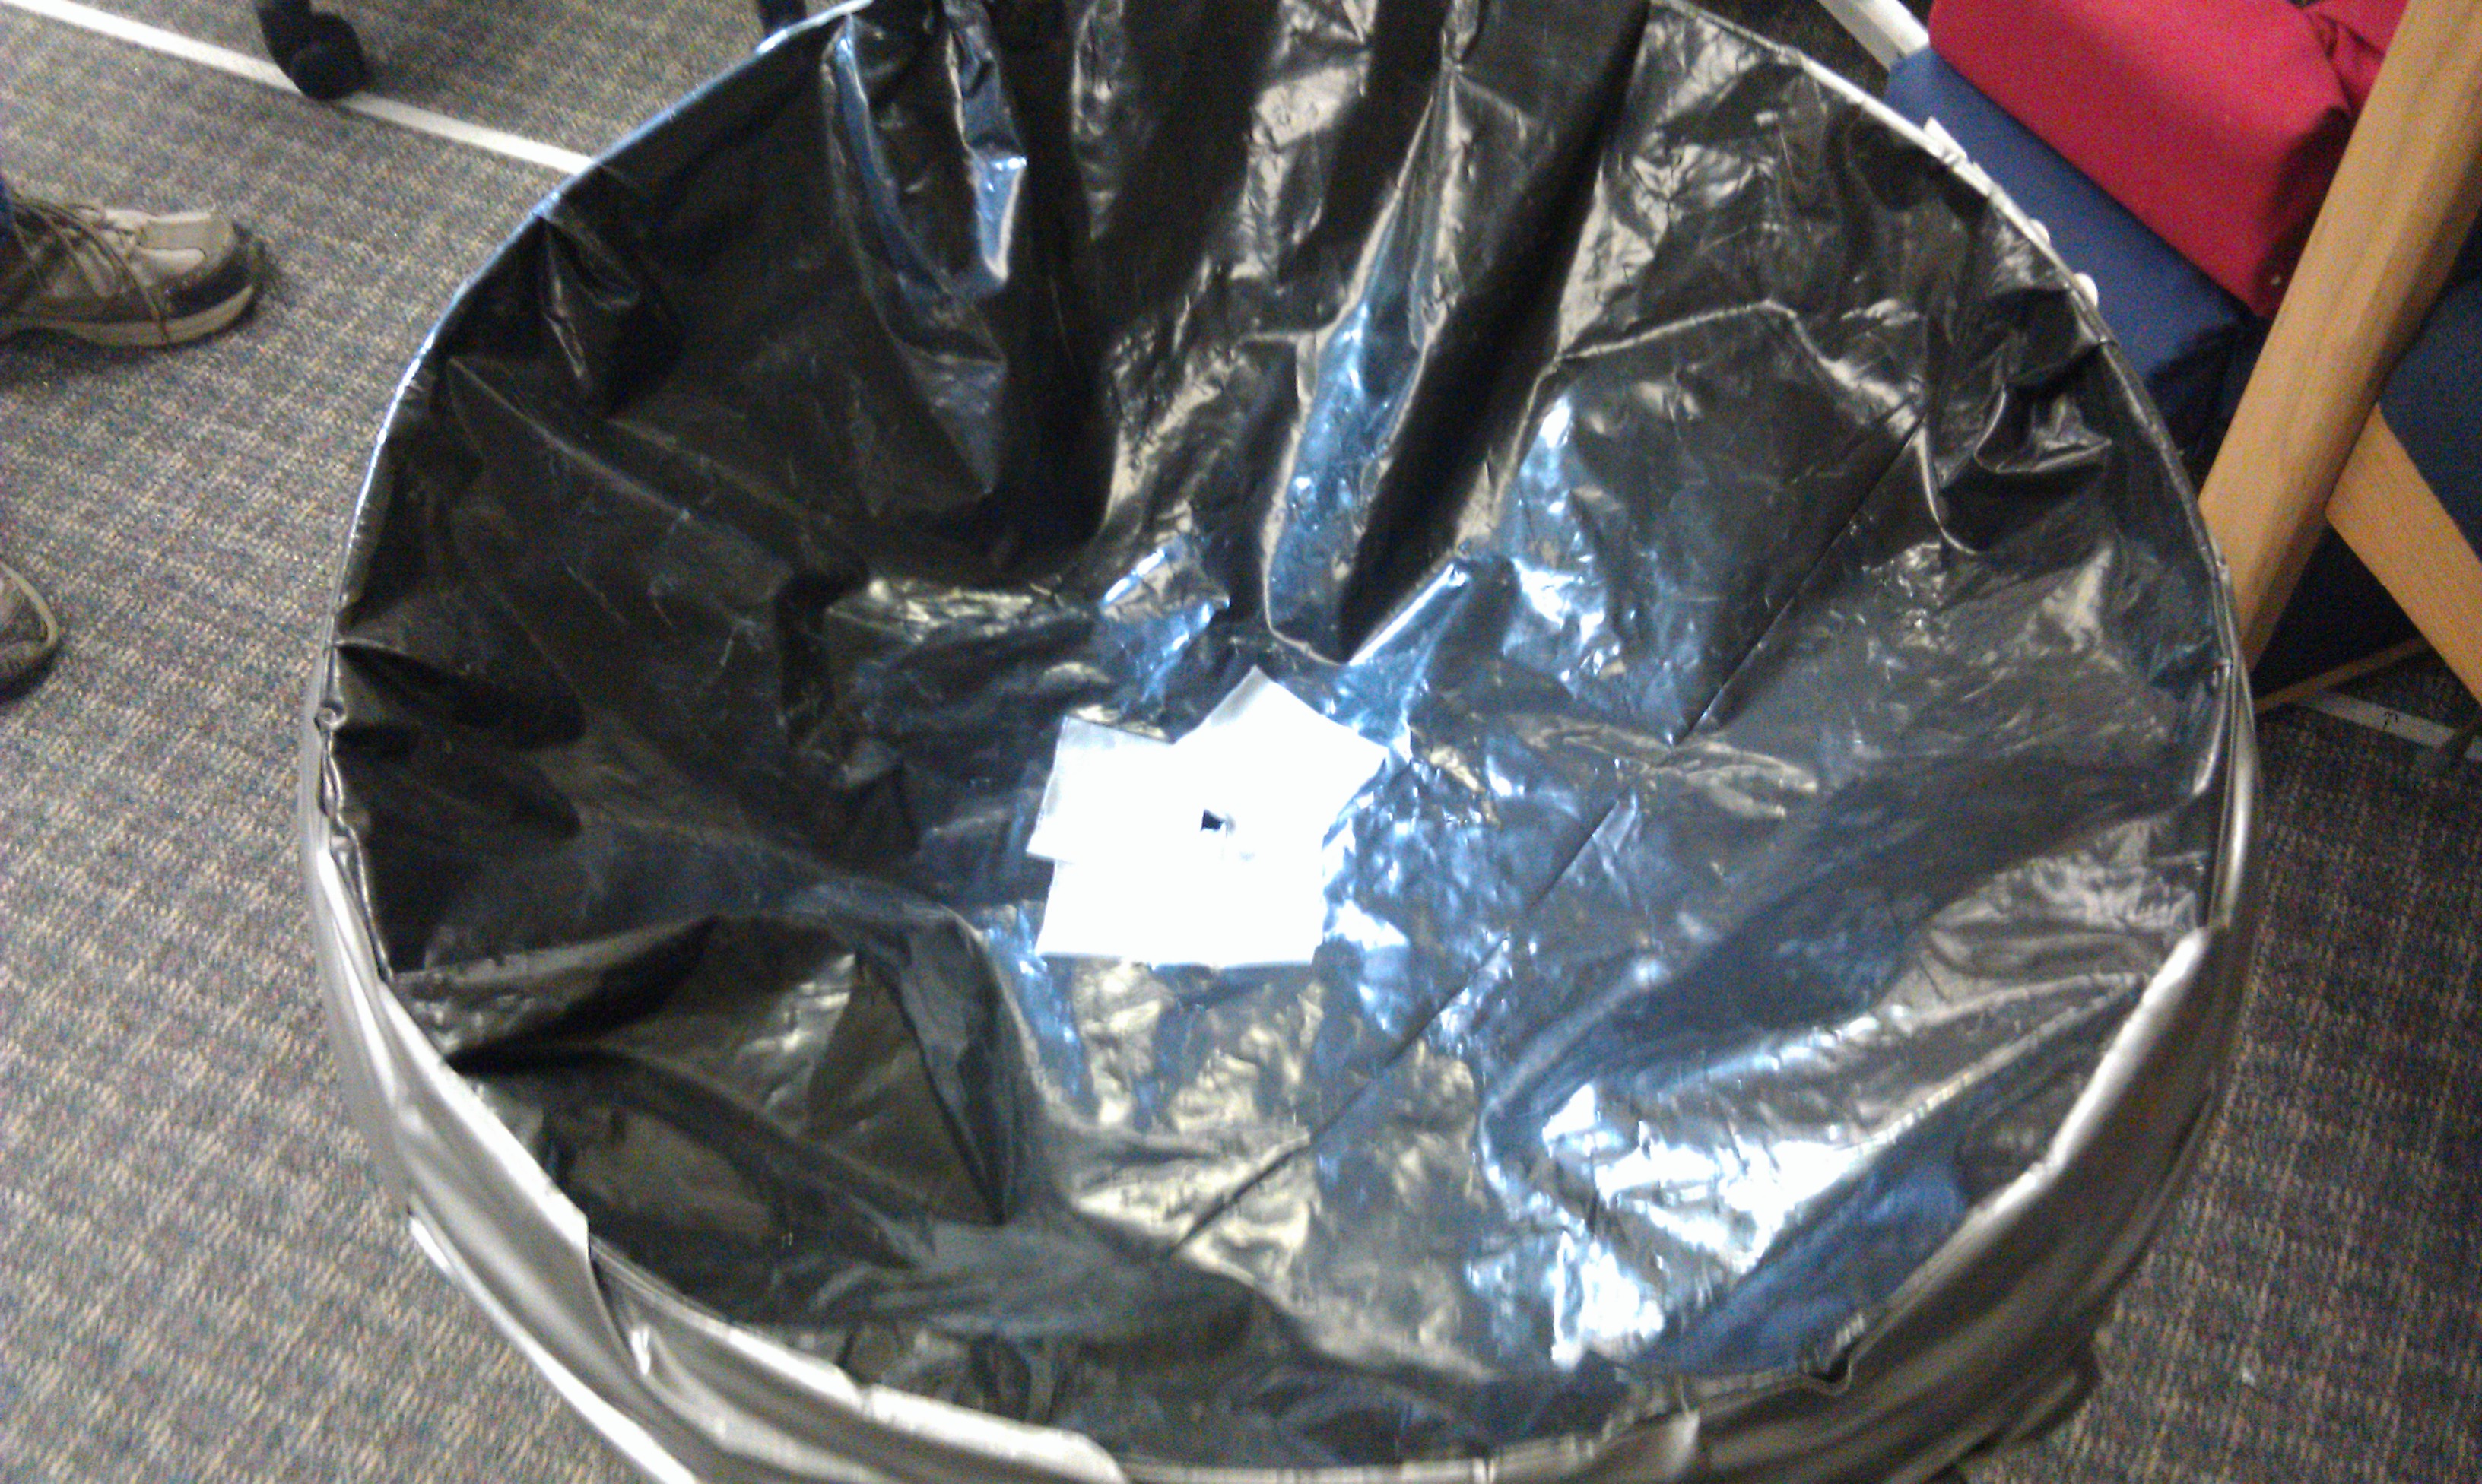
Vortex cannon diaphragm using 5mil sheeting.
I wanted to see how big of a vortex cannon we could build. Following some examples I saw on the internet I picked up a garbage can at Recycle Reuse and grabbed some 5 mil plastic sheeting I was using for the garden. This weekend we fabbed a prototype smoke cannon. The design is really simple, you just saw out a circle in the bottom of the garbage can and add a plastic diaphragm on the open side of the can (I secured it with some large rubber bands and duct tape). The trick is to provide a good amount of slack on the diaphragm.
The smoke machine makes the vortex rings visible. This weekend I tried to use some dry ice “smoke” to visualize the rings. The results weren’t that impressive, but playing with five pounds of dry ice was really fun (hint, if you put a quarter on dry ice it “squeals”). Today we tried using a professional fog machine and the results were much more impressive as you can see for yourself.
As for the rest of the animatronics we want the dragon’s eyes and eyebrows to move and for the dragon to play sounds. If we have enough time we want the dragon to have some “ground effects” LED lights. Right now the plan is to drive all of this off the GPIO pins on two raspberry pi’s. We plan to drive the pi’s off a separate router system connected to the cRio’s filtered 5V power supply (with a step up converter). The smoke ring mechanism and smoke generator will probably run off the cRio. The plan is to have each of the pi’s run a python script that provides access to PyGame (for sound), pi-blaster, and servo blaster. Tentatively I think we can use the Pika RabbitMQ library to move message between a client control application and servers running on the raspberry pi. Both the raspberry pi’s will be dispatched by running a client python app that also uses PyGame to grab input from the keyboard and a joystick. Right now we have a skeleton github repo for the project that should get filled out over the course of the summer. I must also add that I am really impressed with the AdaFruit Black Raspberry Occidentalis raspian distro. I am going to be gone for the next month so I can point the kids to the tutorials and let them go to town.
How To Build Raised Garden Beds
April 24th, 2013 | Posted by in Ann Arbor | domestic life | gardening | Michigan | plants - (Comments Off on How To Build Raised Garden Beds)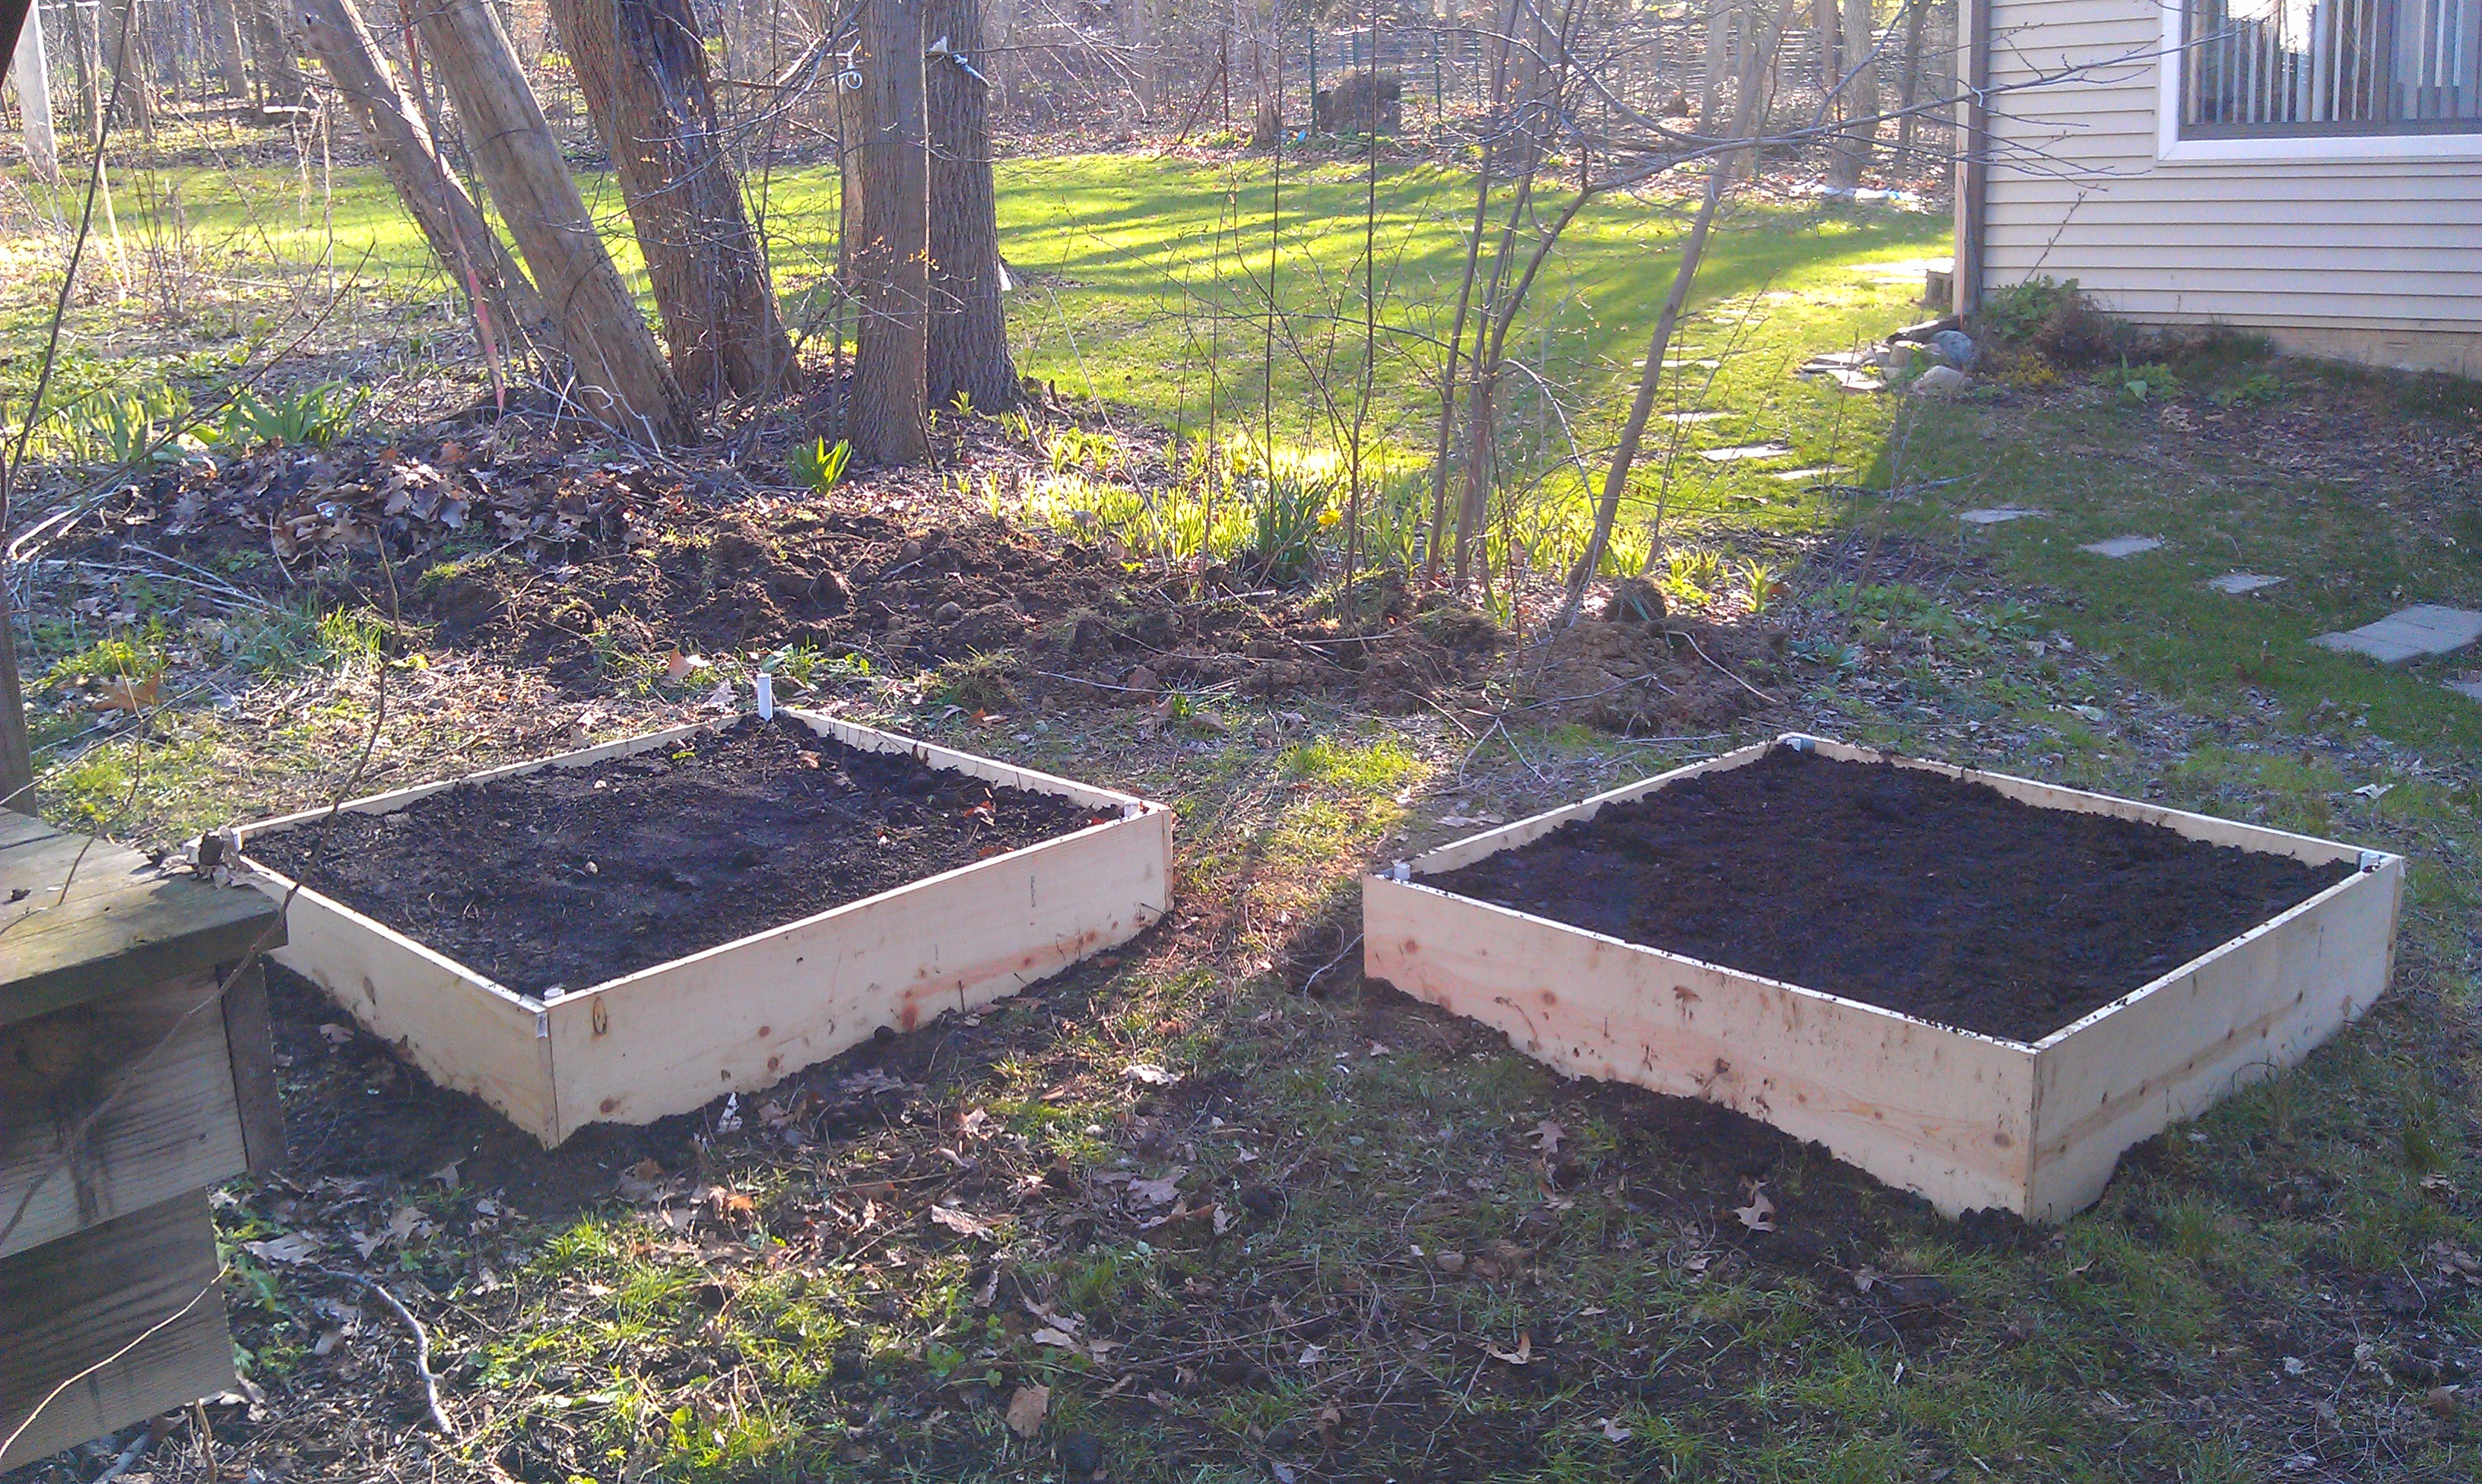
The finished product, two 4’x4′ raised beds.
The weather in Michigan was finally warming up so I decided it was time to build some garden beds. I had helped build raised beds in the past but I had never done it on my own. It ended up being a lot easier than I expected and I was able to build two of them over the weekend and still have time to go out.
My backyard is extremely small and a good portion of it is taken up by a platform and stairs that lead to the upstairs apartment. To make matters worse the yard is sloped and has a small wooded area with a few large trees that subdivide my yard from the neighbors. Since I had so little space to work with I opted to build two “square foot” style raised bed gardens. Square foot gardening is a methodology that has been around for almost 30 years and it provides great results in a limited amount of space. The addition of the raised beds helps to prevent soil compaction and generally make the garden a lot easier to maintain. Since my yard is sloped the beds also prevent my soil from running everywhere when it rains.
All told I spent just a little over $100 for all the parts to build the garden including the compost. I also built the beds in such a way that I could quickly add a trellis or hoop house depending on what I wanted to grow and the time of year by snapping the fixtures into some PVC pipe I placed at the corners of the beds. Here is the materials list to create a single raised bed.
- 4 12″x4’x1″ pre-sawn sections of untreated pine (~$6.50 each)
- 8 3″ 18Ga steel angle brackets (~$1.25 each)
- 1 50 count box of #8 3/4″ wood screws (~$4.65 each)
- 2 4 count packs of 1″ two hole pipe strap (~$1.29 each)
- 4 sections of 3/4″x24″ PVC Pipe (cheap)
Make sure you use untreated wood as treated wood can leech preservatives into the soil. I got all of this stuff at Home Depot and I was in and out in about 30 minutes.For the fill dirt I picked up a cubic yard of municipal compost from the city for only $21.20. The compost looks fantastic and I mixed with a bit of the fill dirts from the bed and some leaf litter from around the yard to fill up the beds completely. You will want a five gallon bucket to move it around as well as a tarp to put it on so it doesn’t run all over the yard.
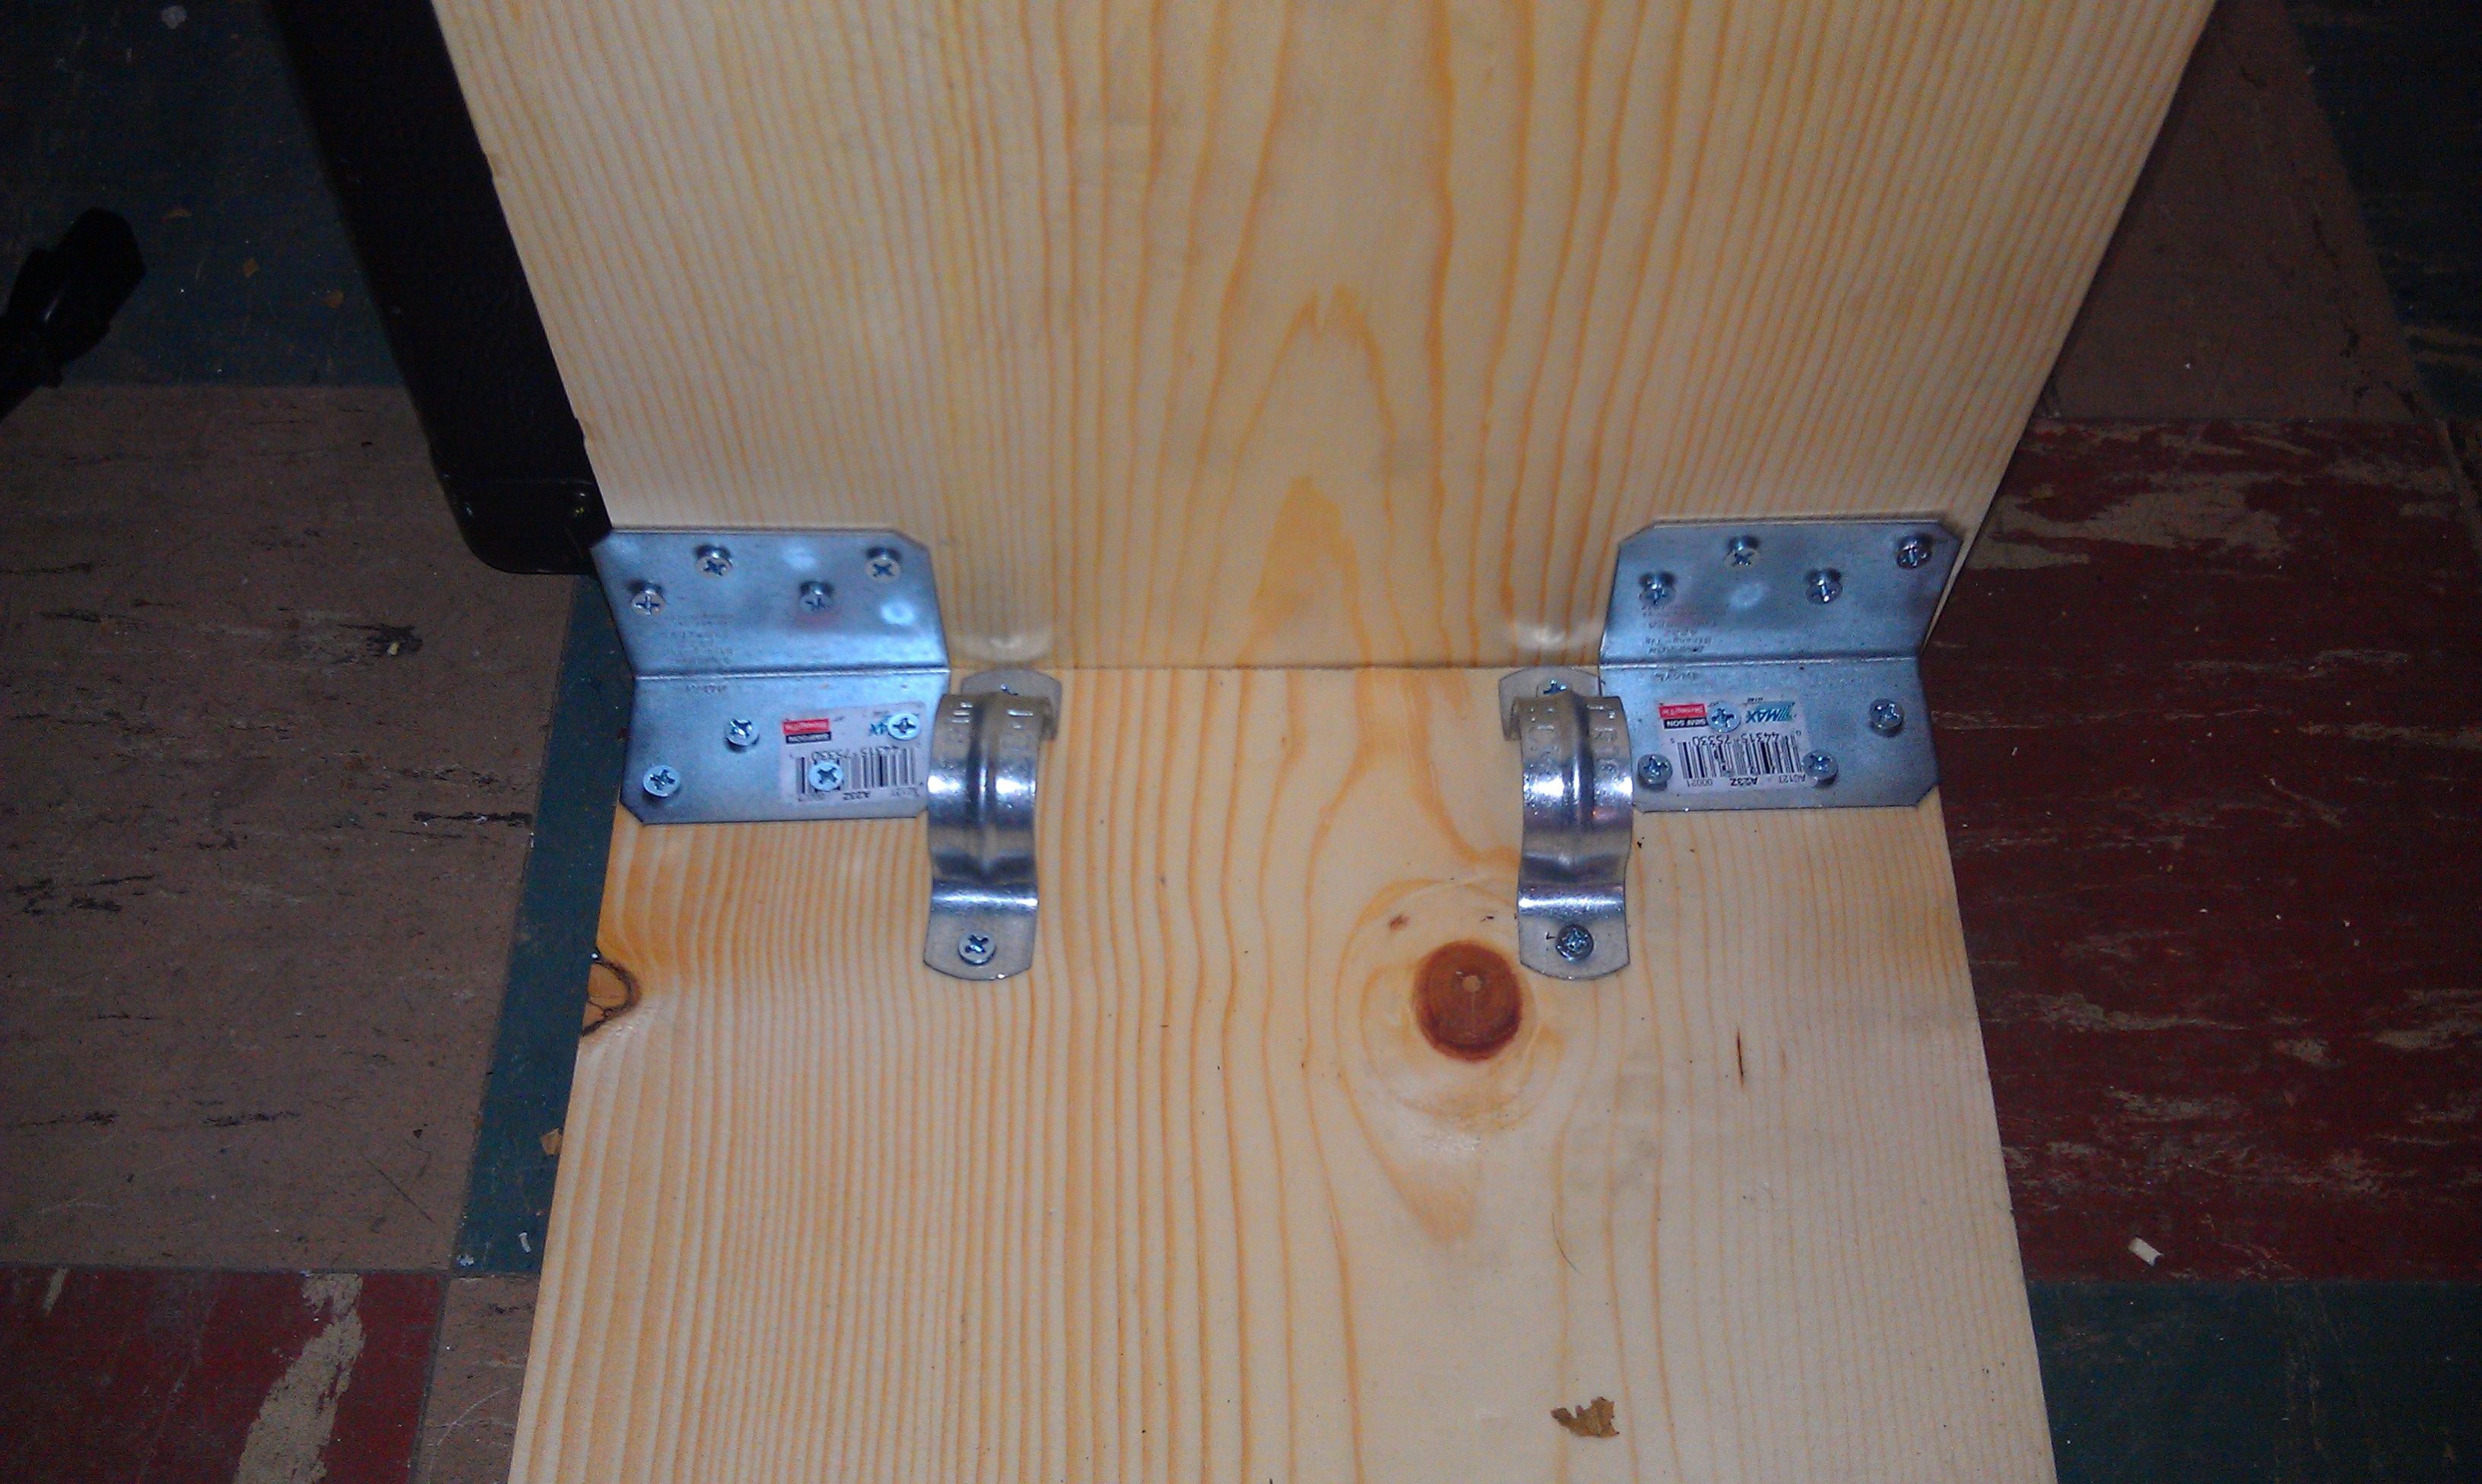
To construct the beds I really quickly manufactured four “connector boards” where I placed the L brackets and pipe straps onto the board. I made sure to leave just enough space on these boards so I could get the drill to fit in the corners of the beds.
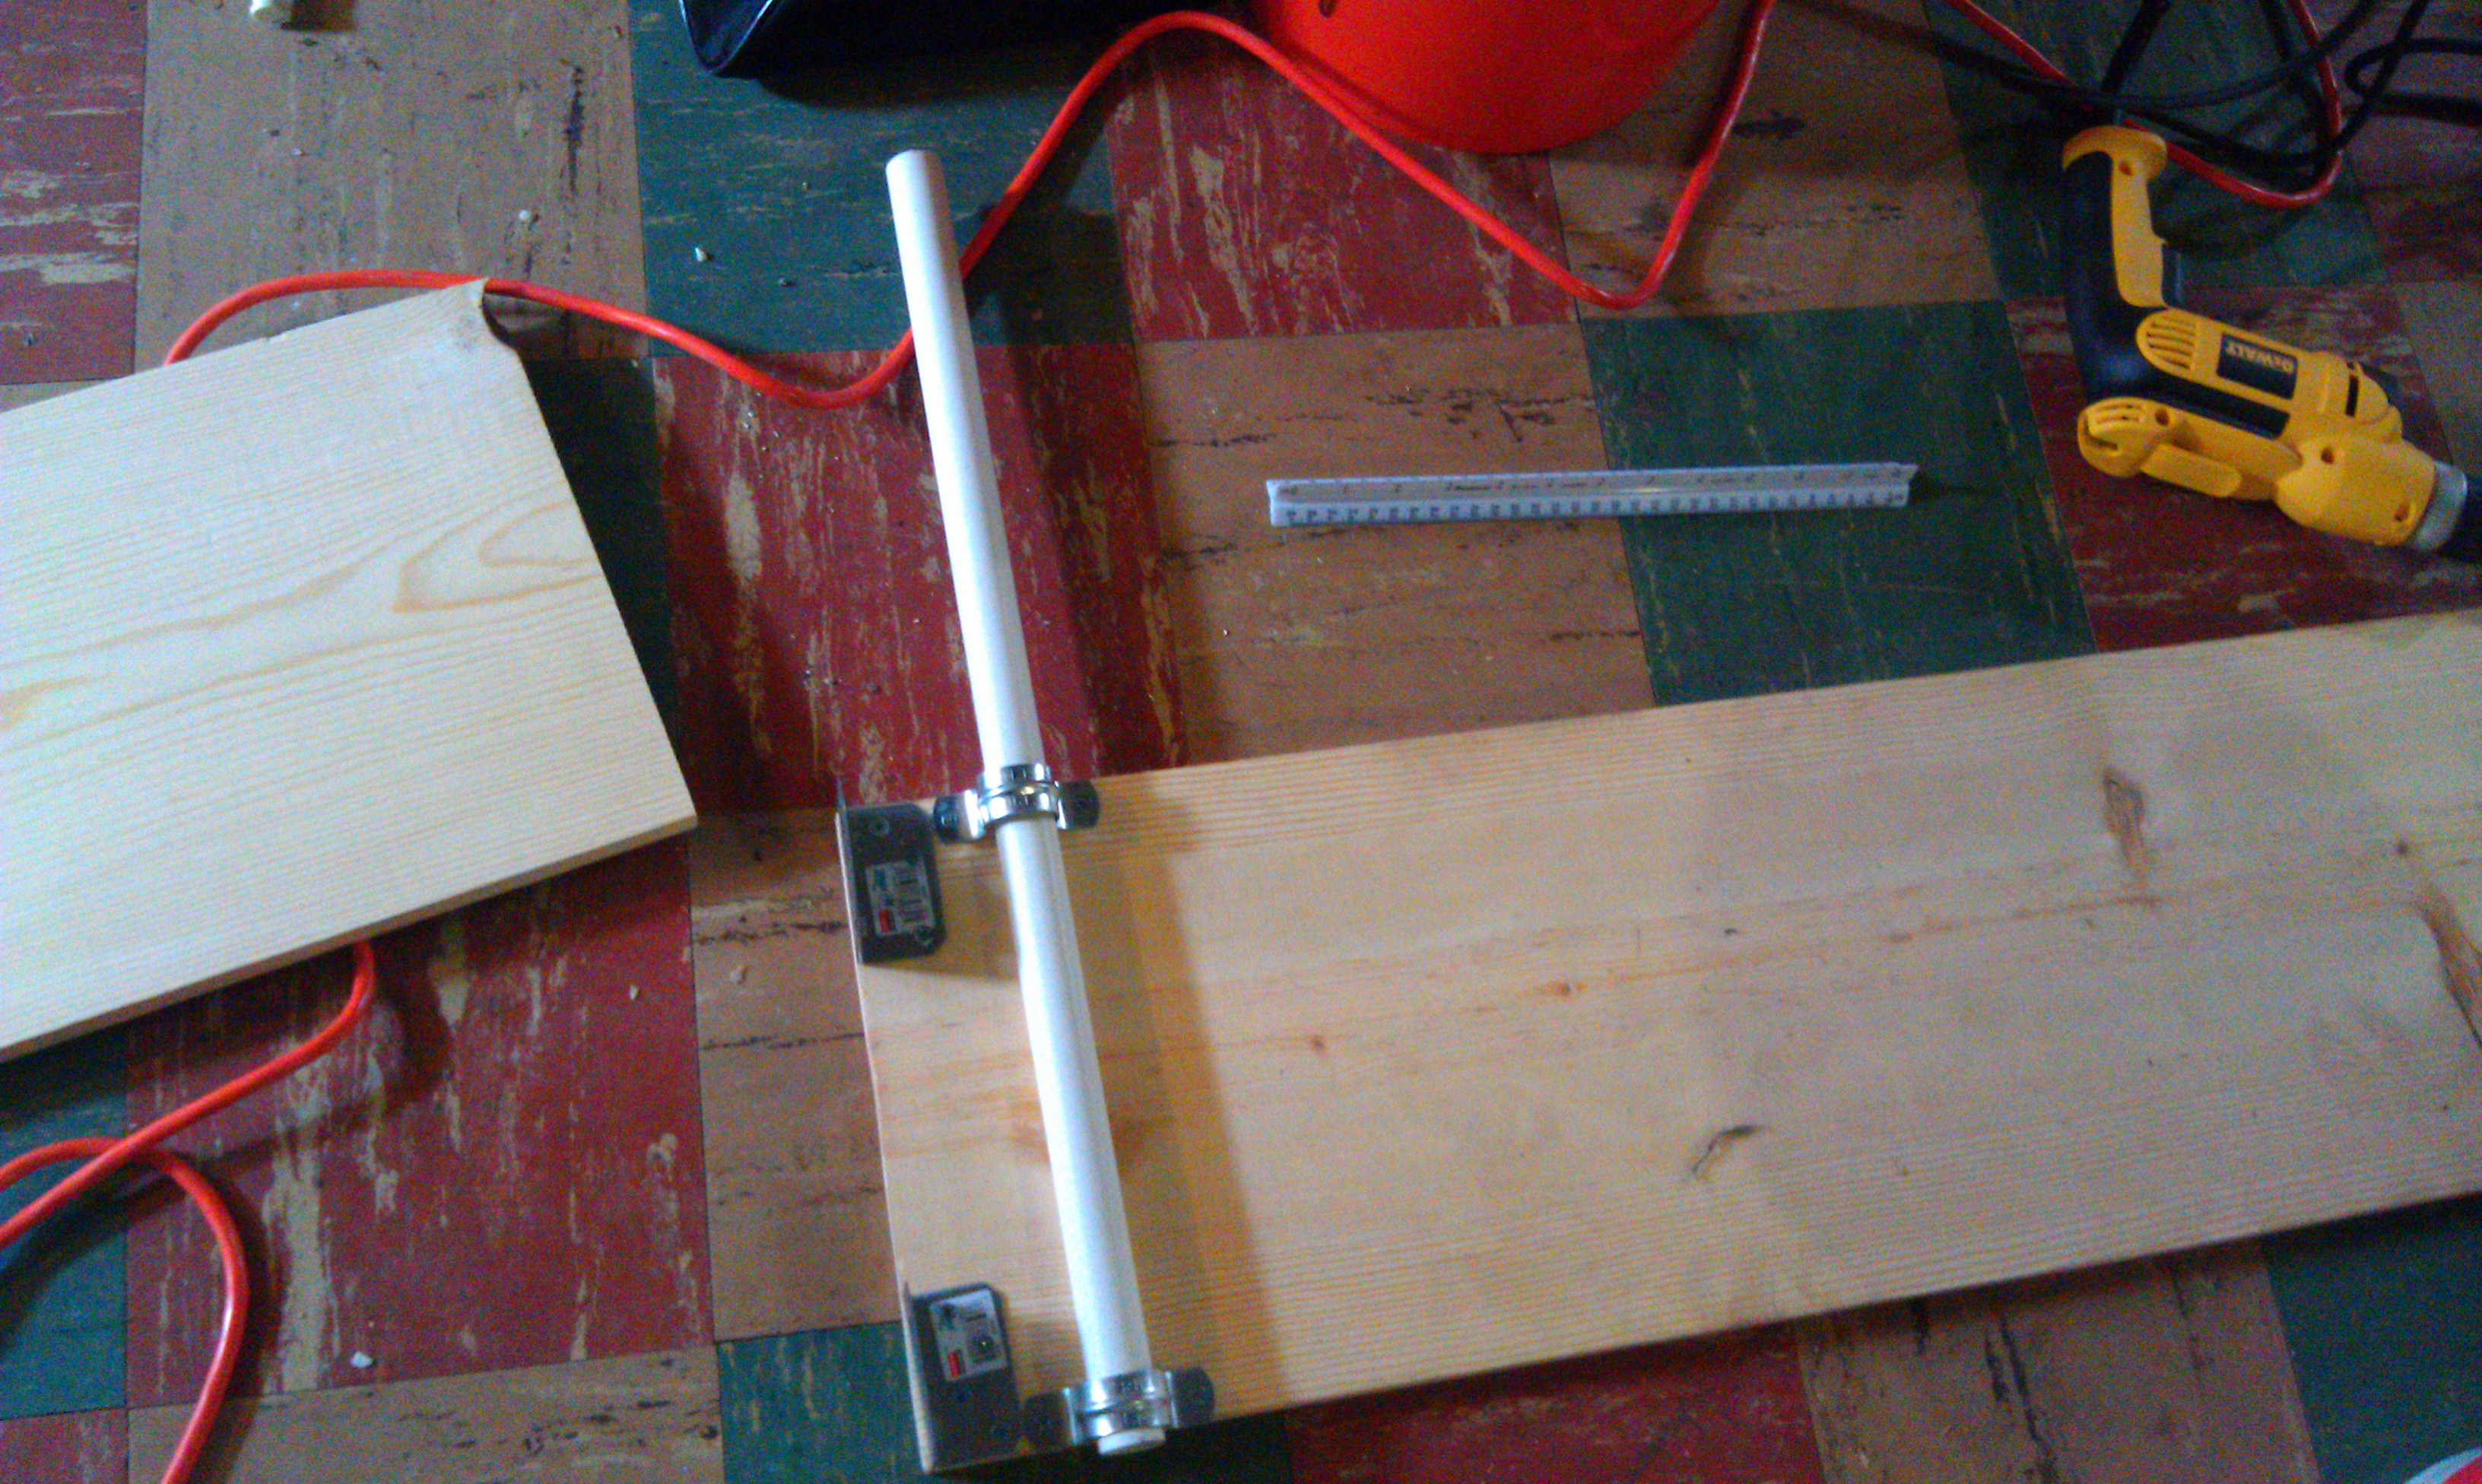
One side of the “connector” boards. Note the placement of the pipe straps to make it easier to screw everything together.
Once I finished my connector boards I then screwed each one onto a plain board to form four “L” shaped pieces. To do this I put the connector board on the floor up against a wall and then wedged a regular board behind it.
Once I finished the “L” sections I took the whole thing outside and used some cinder blocks to hold everything in place while screwed the sections together. I then started digging out the beds. I wanted each bed to sit level on the sloped yard so I dug out sections that were more or less flat. I had to make the holes slightly larger than the beds. I used rocks that I found while digging to help prop up the corners and provide some extra drainage. Once the beds were in placed I filled out the outer edge with dirt to secure everything, and then I used the flat side of my shovel to drive the PVC pipe into the ground a foot below the beds. This should keep the beds in places. If I decide I want to build out hoop houses or trellises I can remove the pipes and replace them with suitable materials.
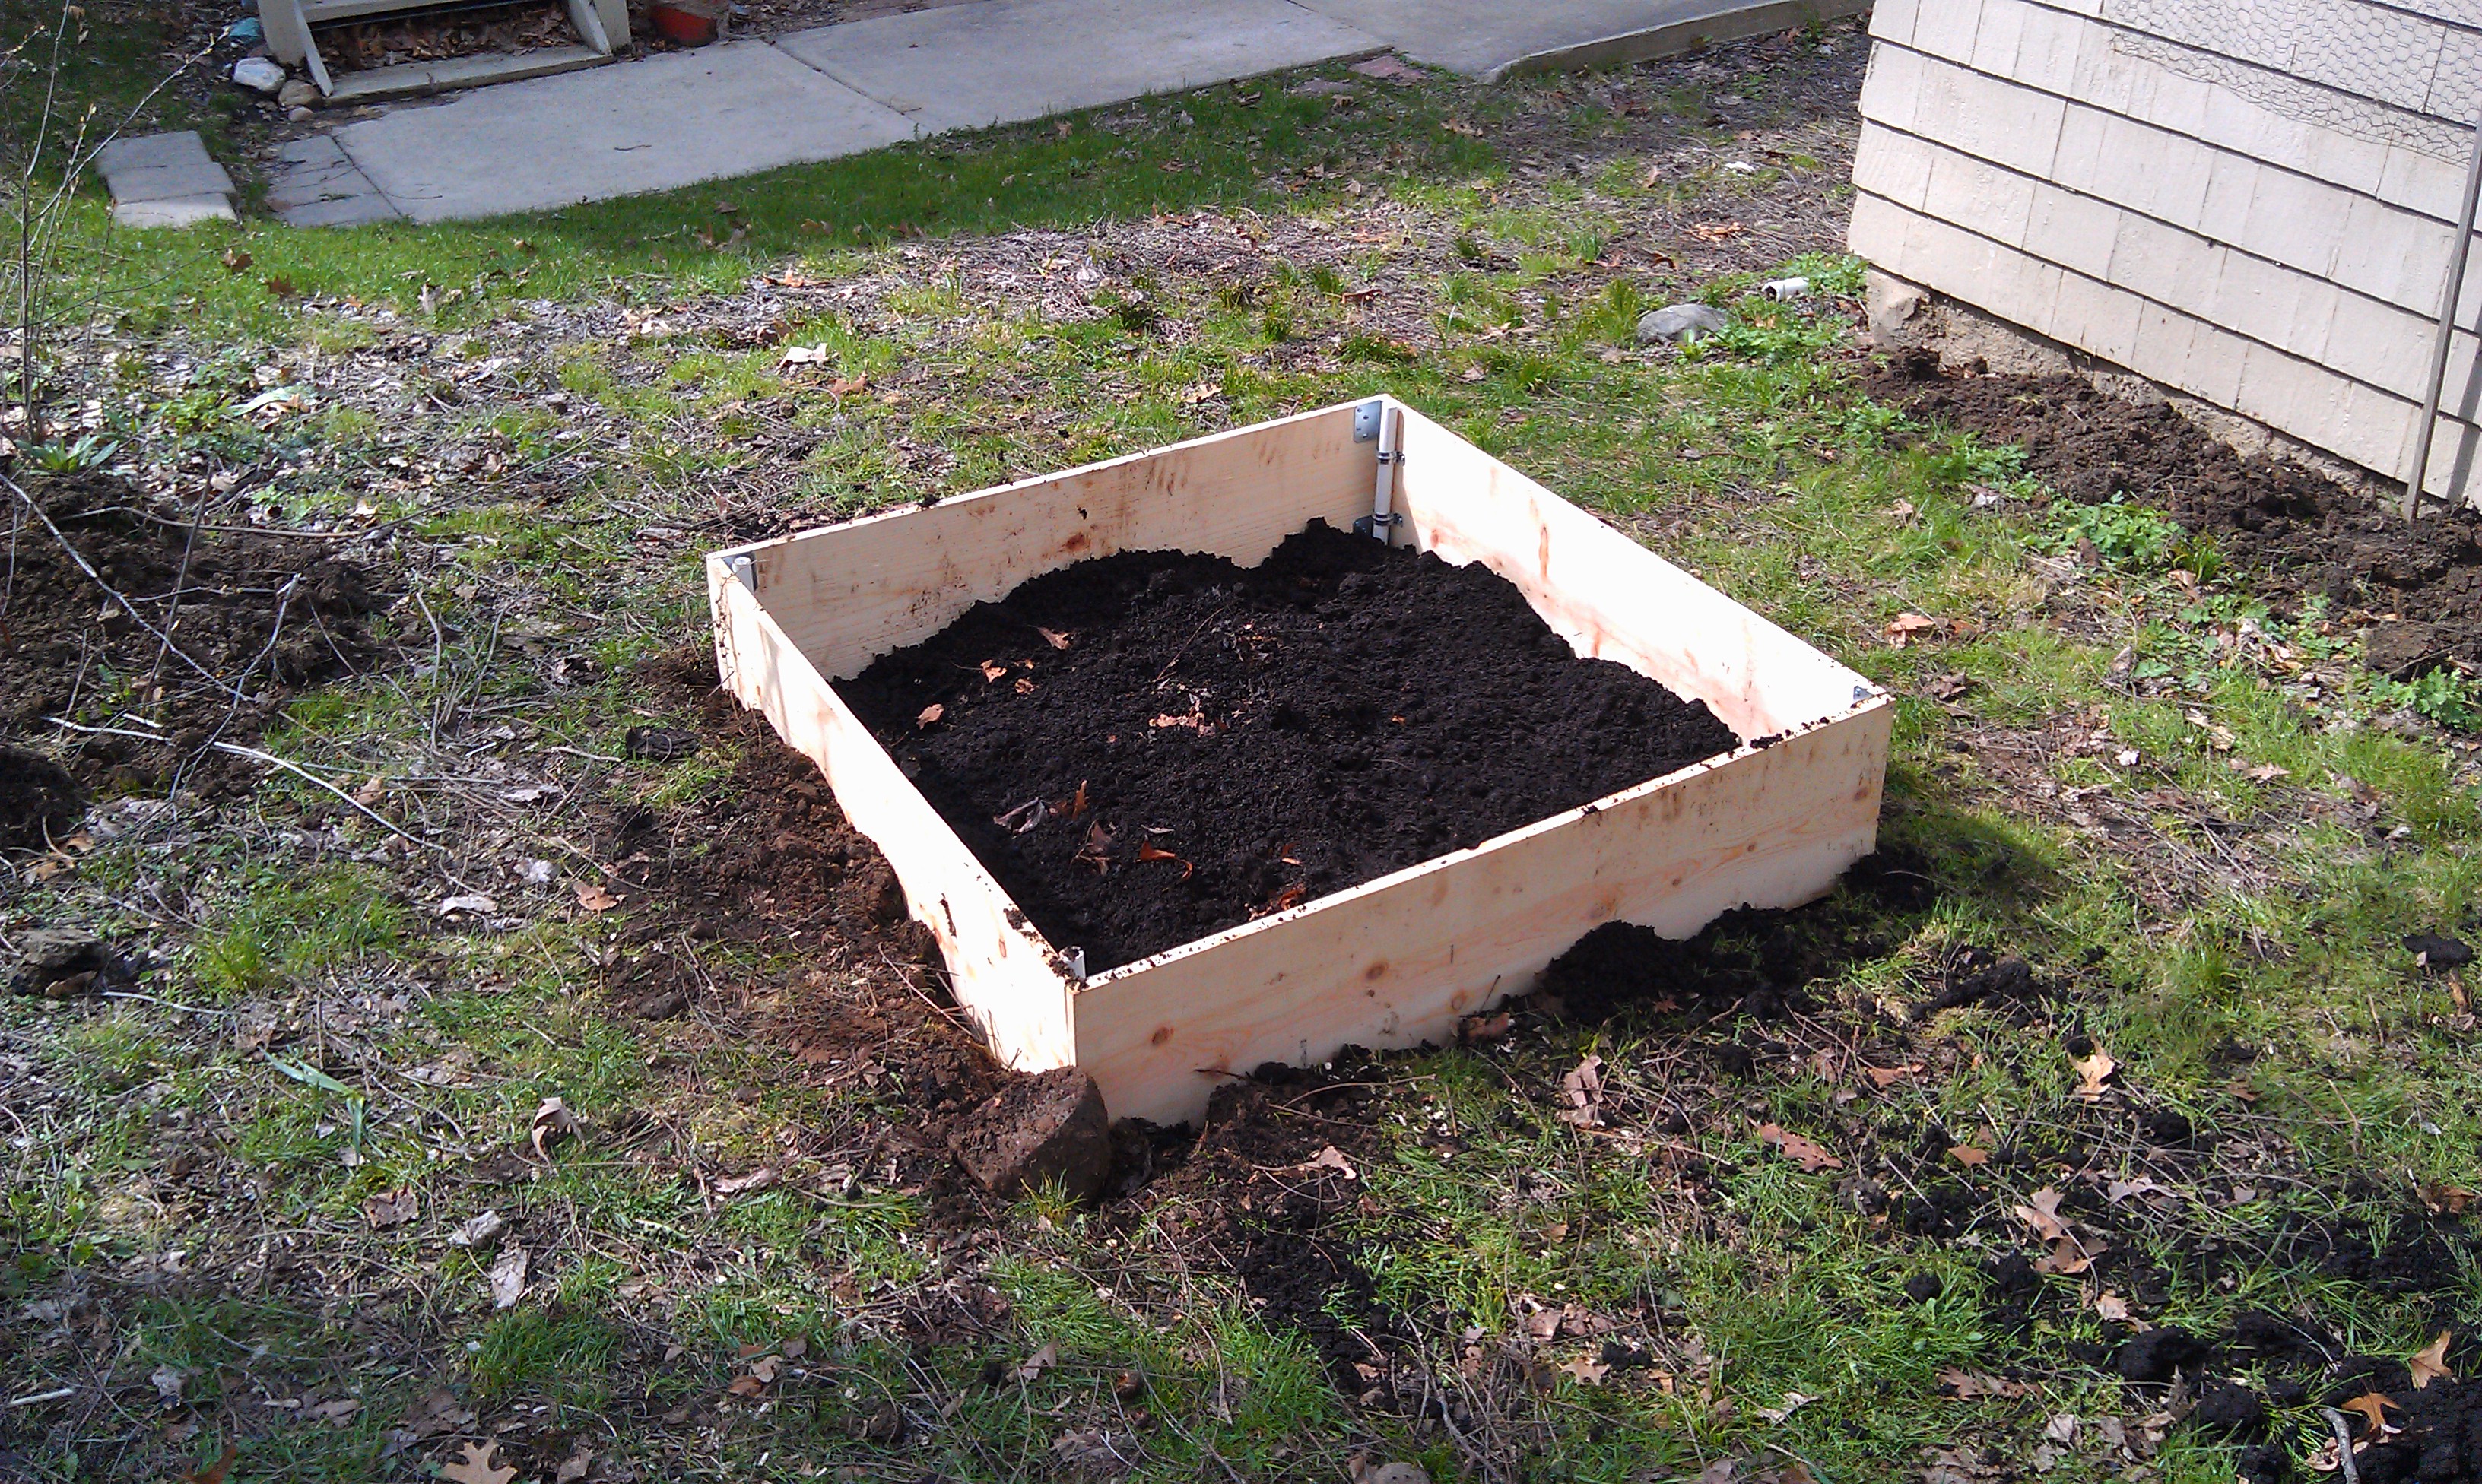
I then proceeded to fill up the raised beds with the compost I got from the city. Residents of Ann Arbor can get a free cubic yard of compost every year from the waste center, I opted to have mine dumped into the back of my friend Joe’s truck which cost $21 but it was money well spent.
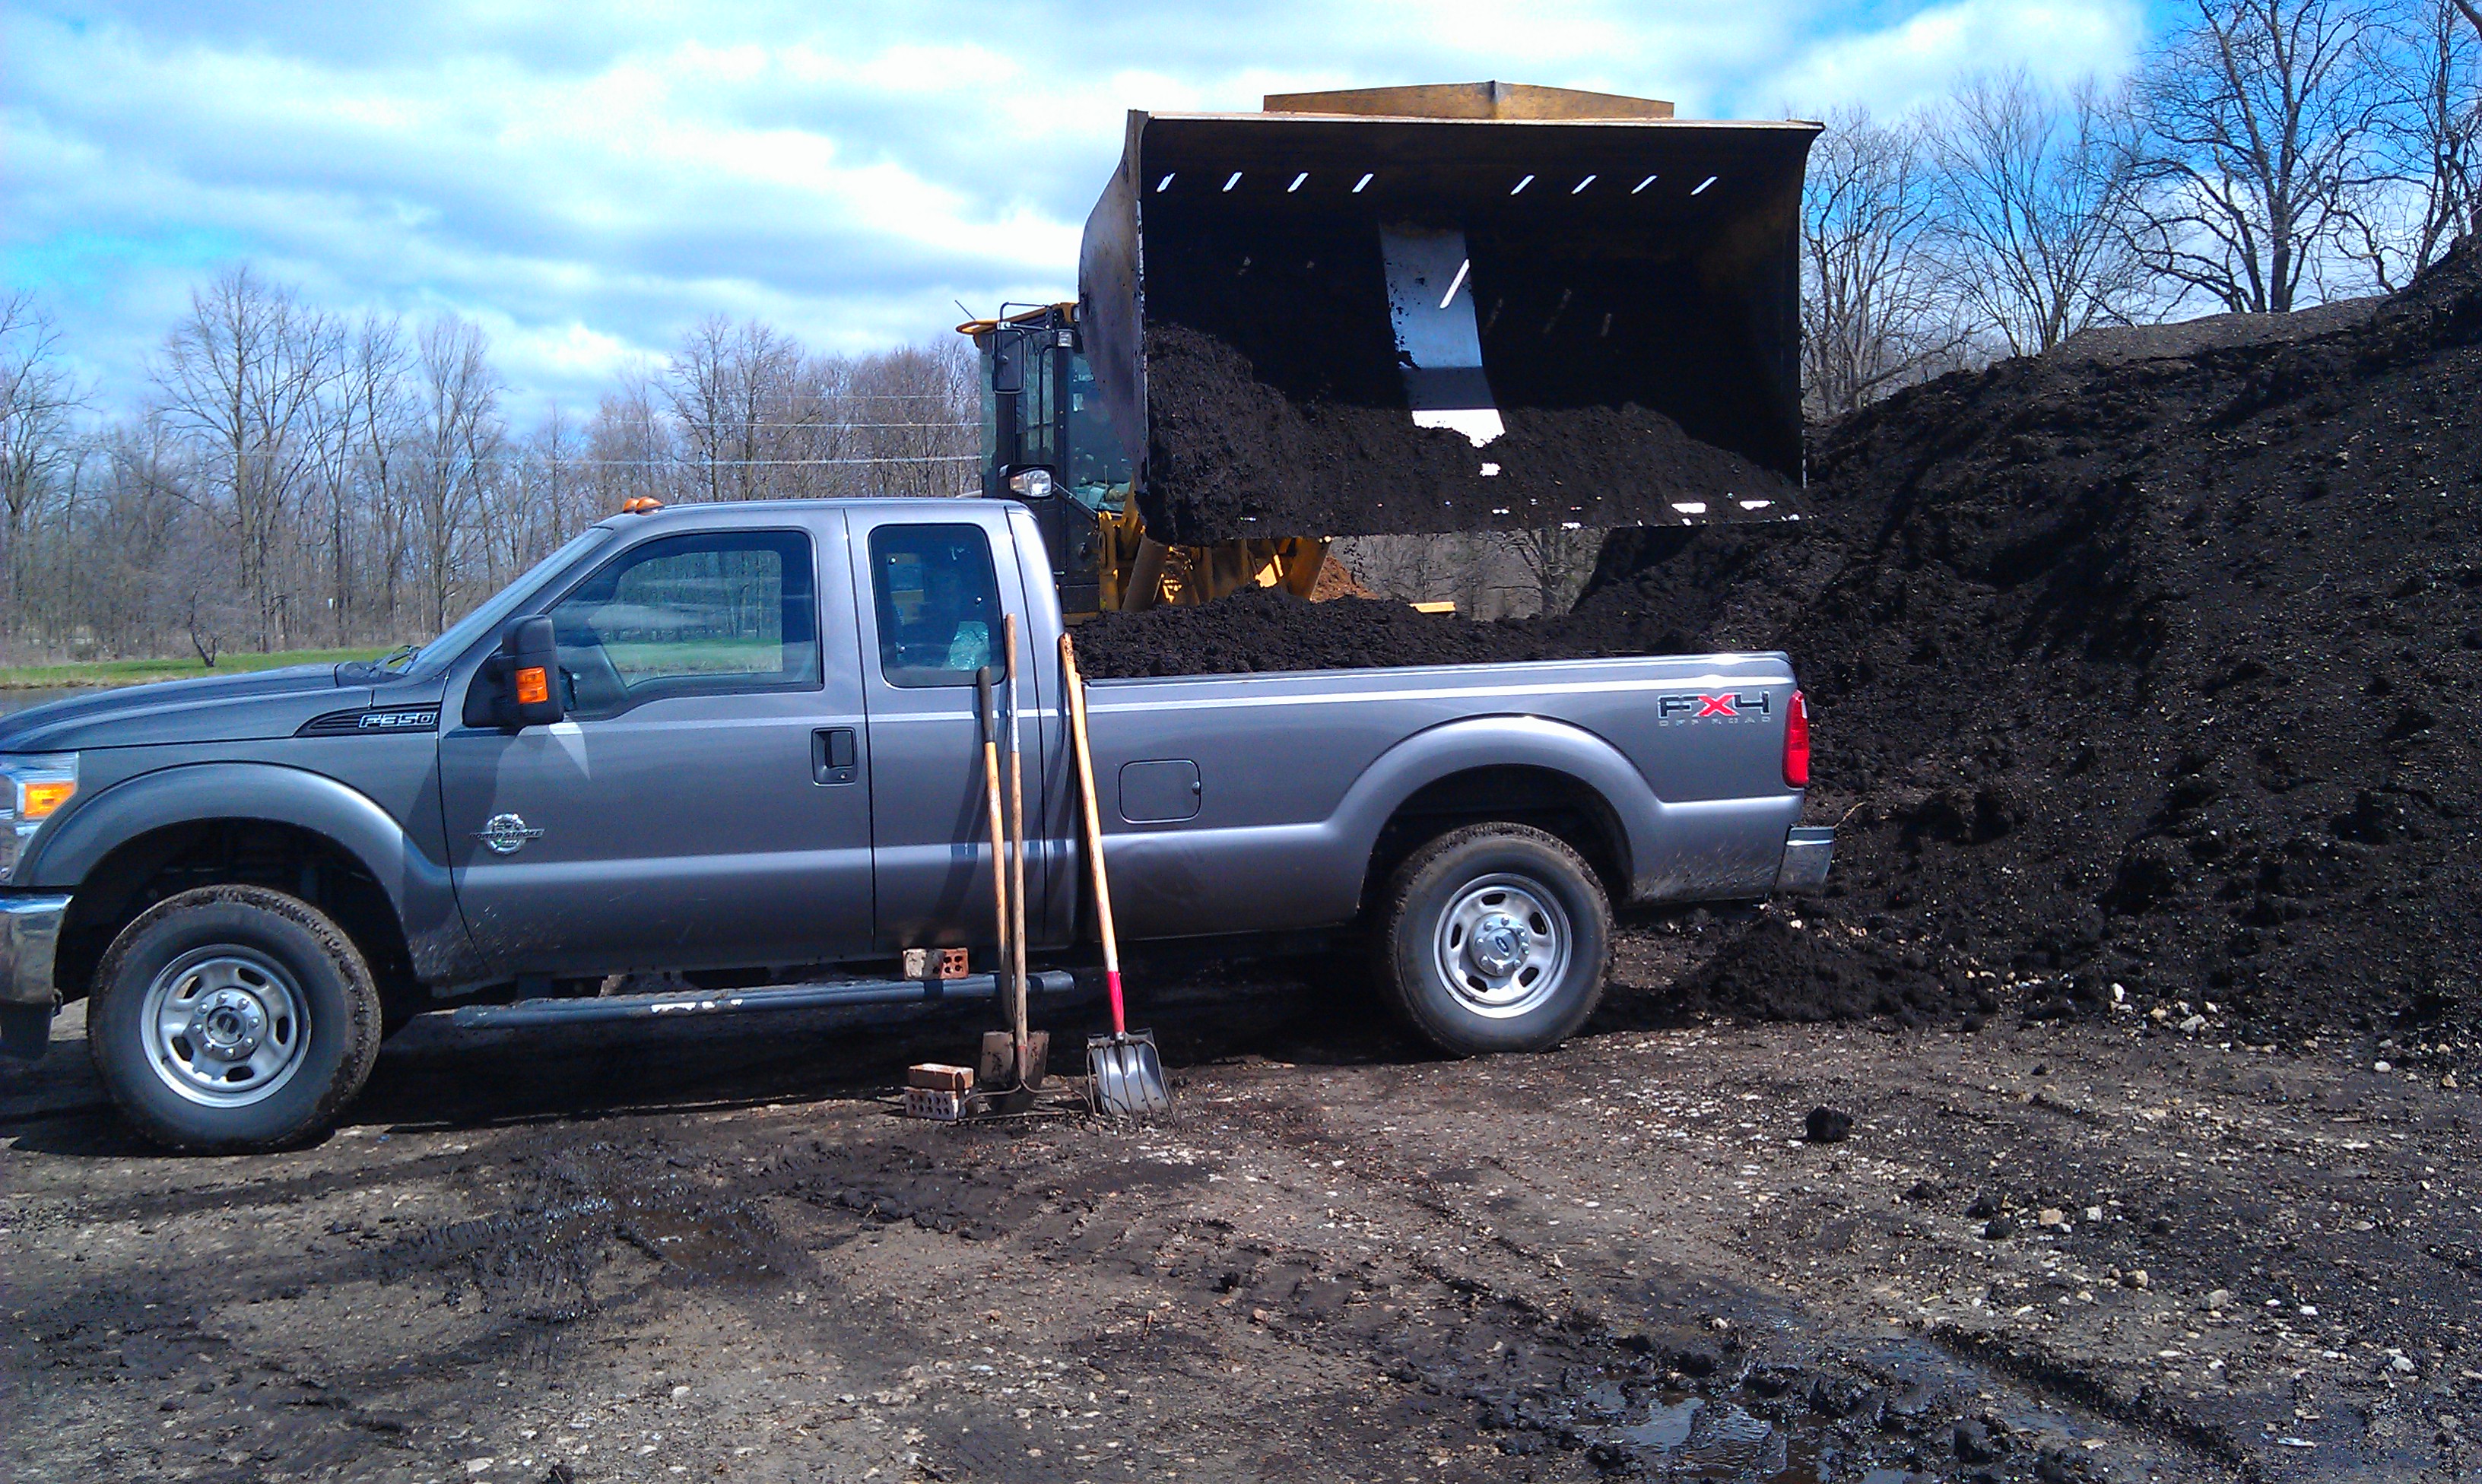
Getting compost from the city of Ann Arbor Compost Center.
It took me almost three hours of shoveling and filling up five gallon buckets to fill the beds. It was back breaking work and I need a long hot bath afterwards but it was well worth it. I just picked up most of my seed from Downtown Home and Garden. They sell seed for most of the common garden vegetables in bulk so it is a lot cheaper. I also ordered some heirloom tomato and pepper seedling from the Project Grow plant sale. I had a Project Grow community garden plot for five years and it is worth noting that all of the proceeds from the sale go directly to Project Grow. This is my current sketch for what I am going to grow in my beds. As with any landscaping project it is helpful to plan your layout first to take into account lighting and watering contraints as well as views. I will post pictures as soon as I get everything in and sprouting.
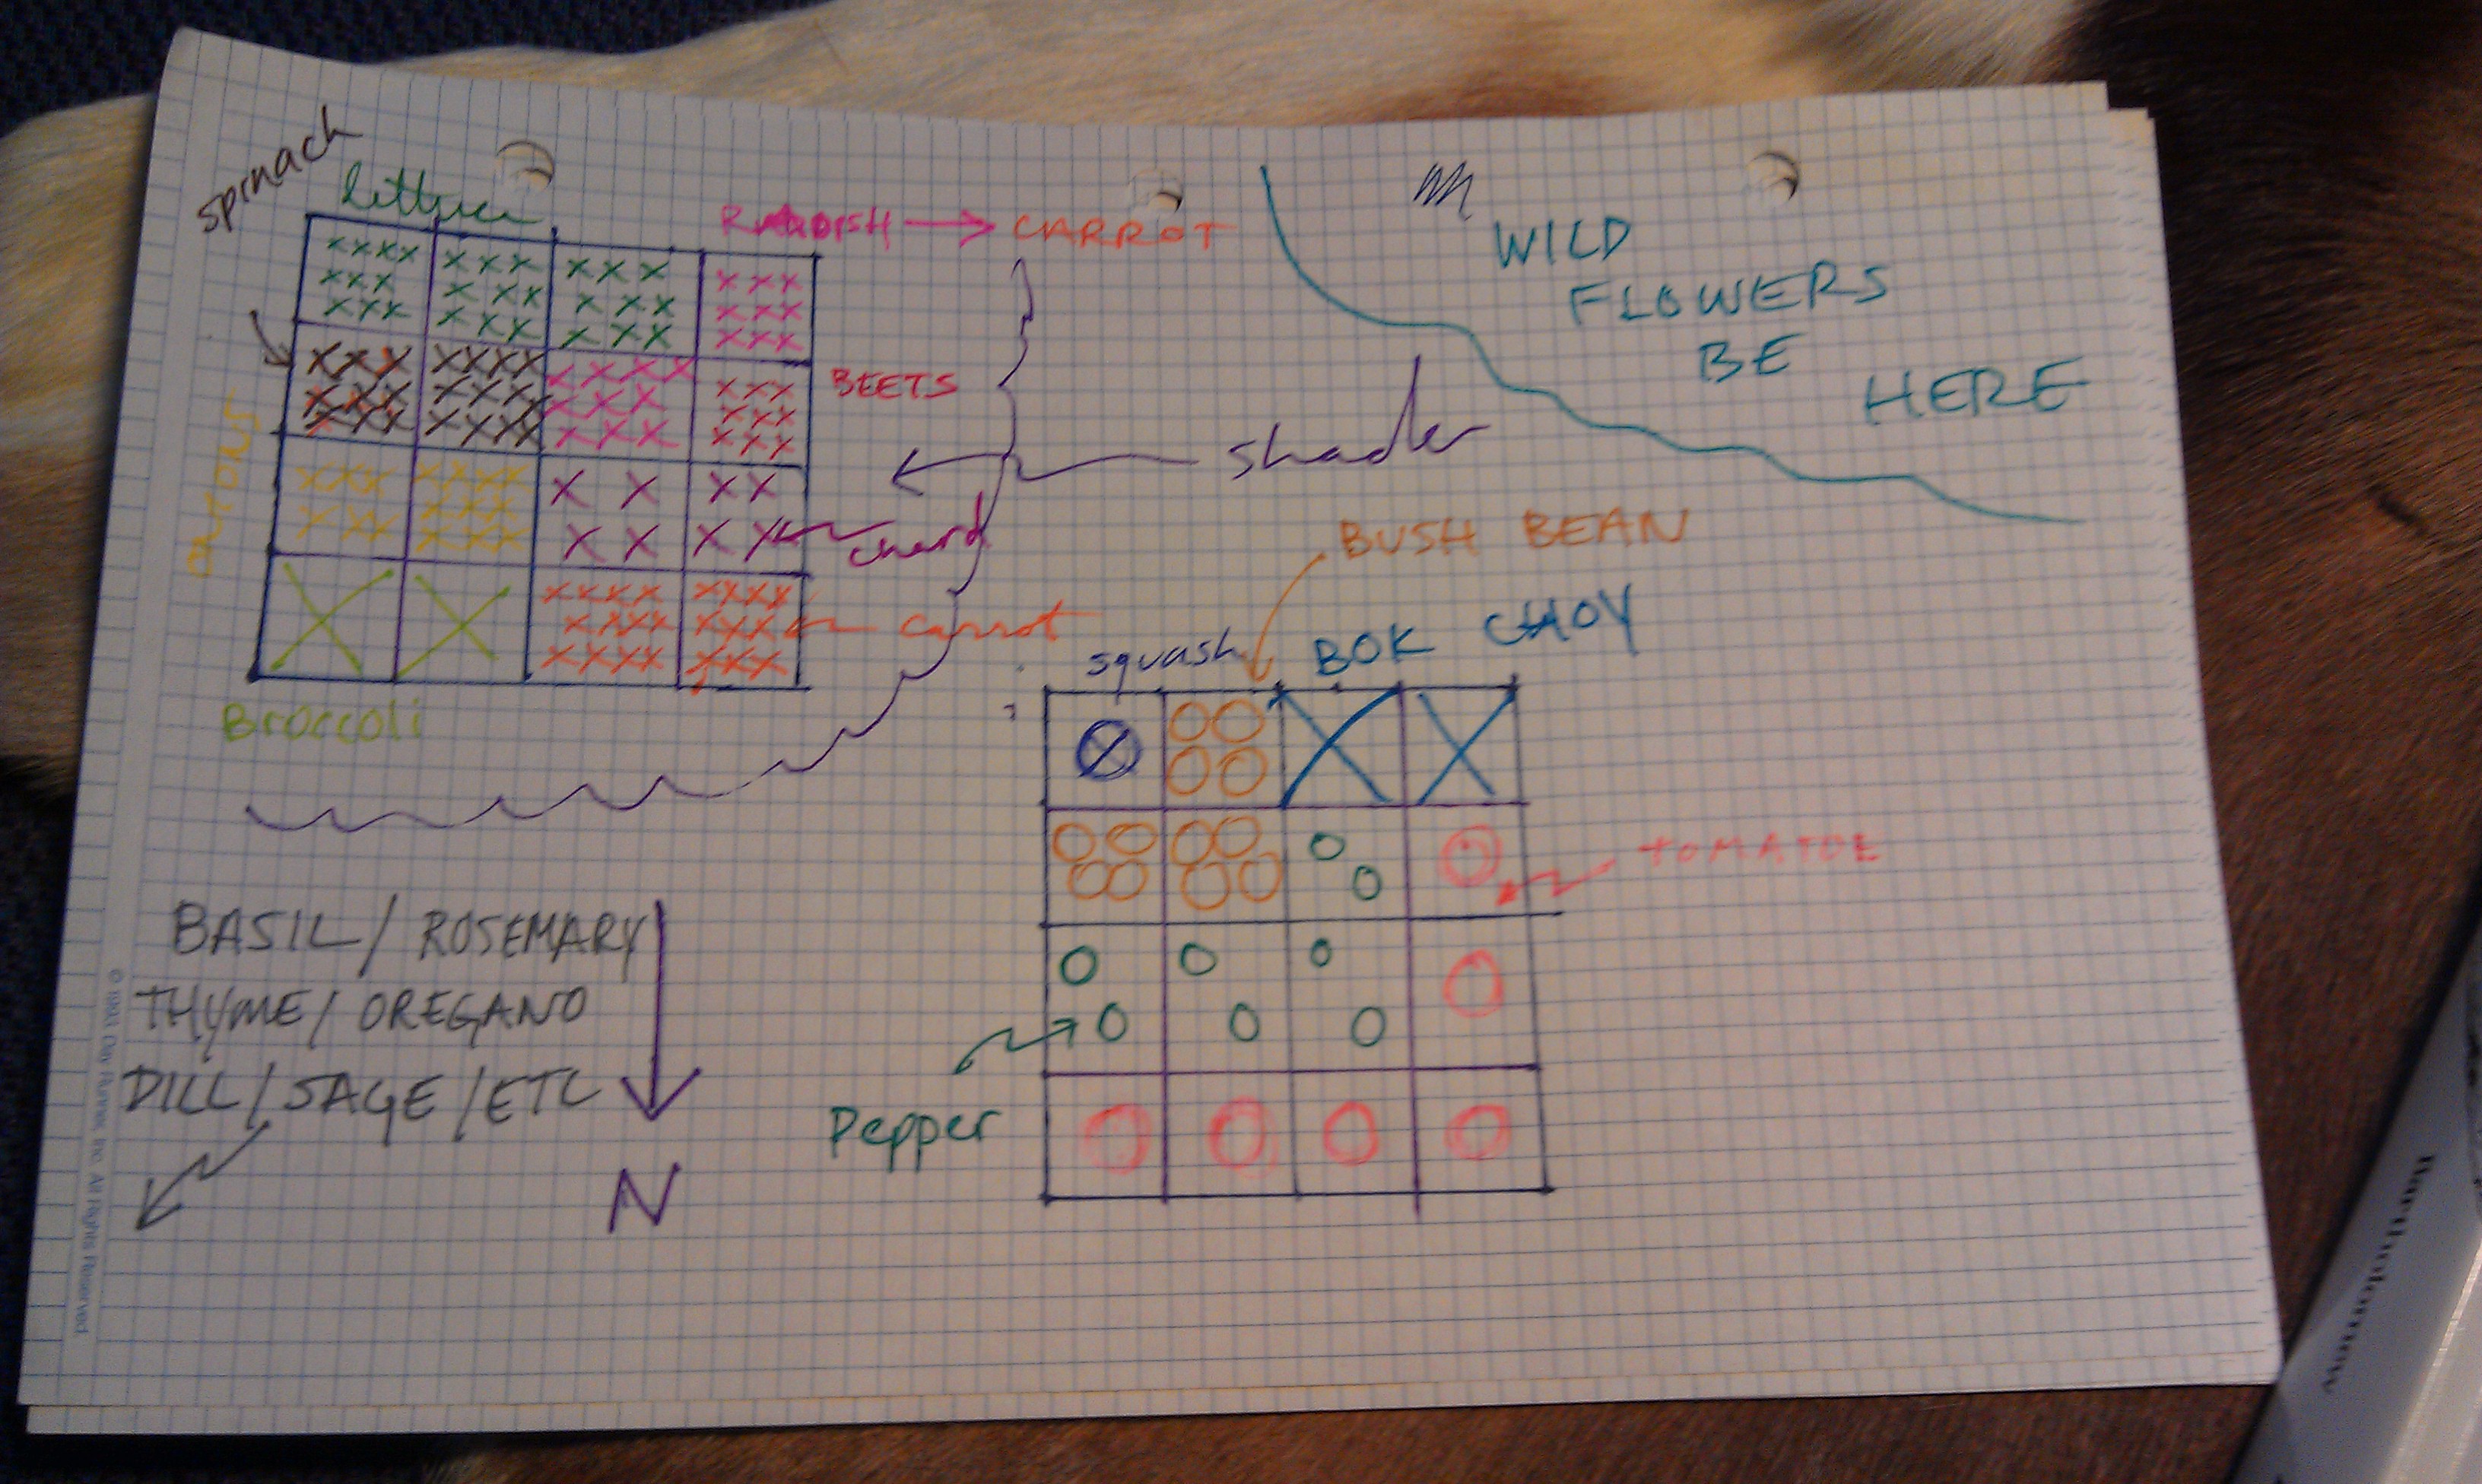
My tentative garden layout.