
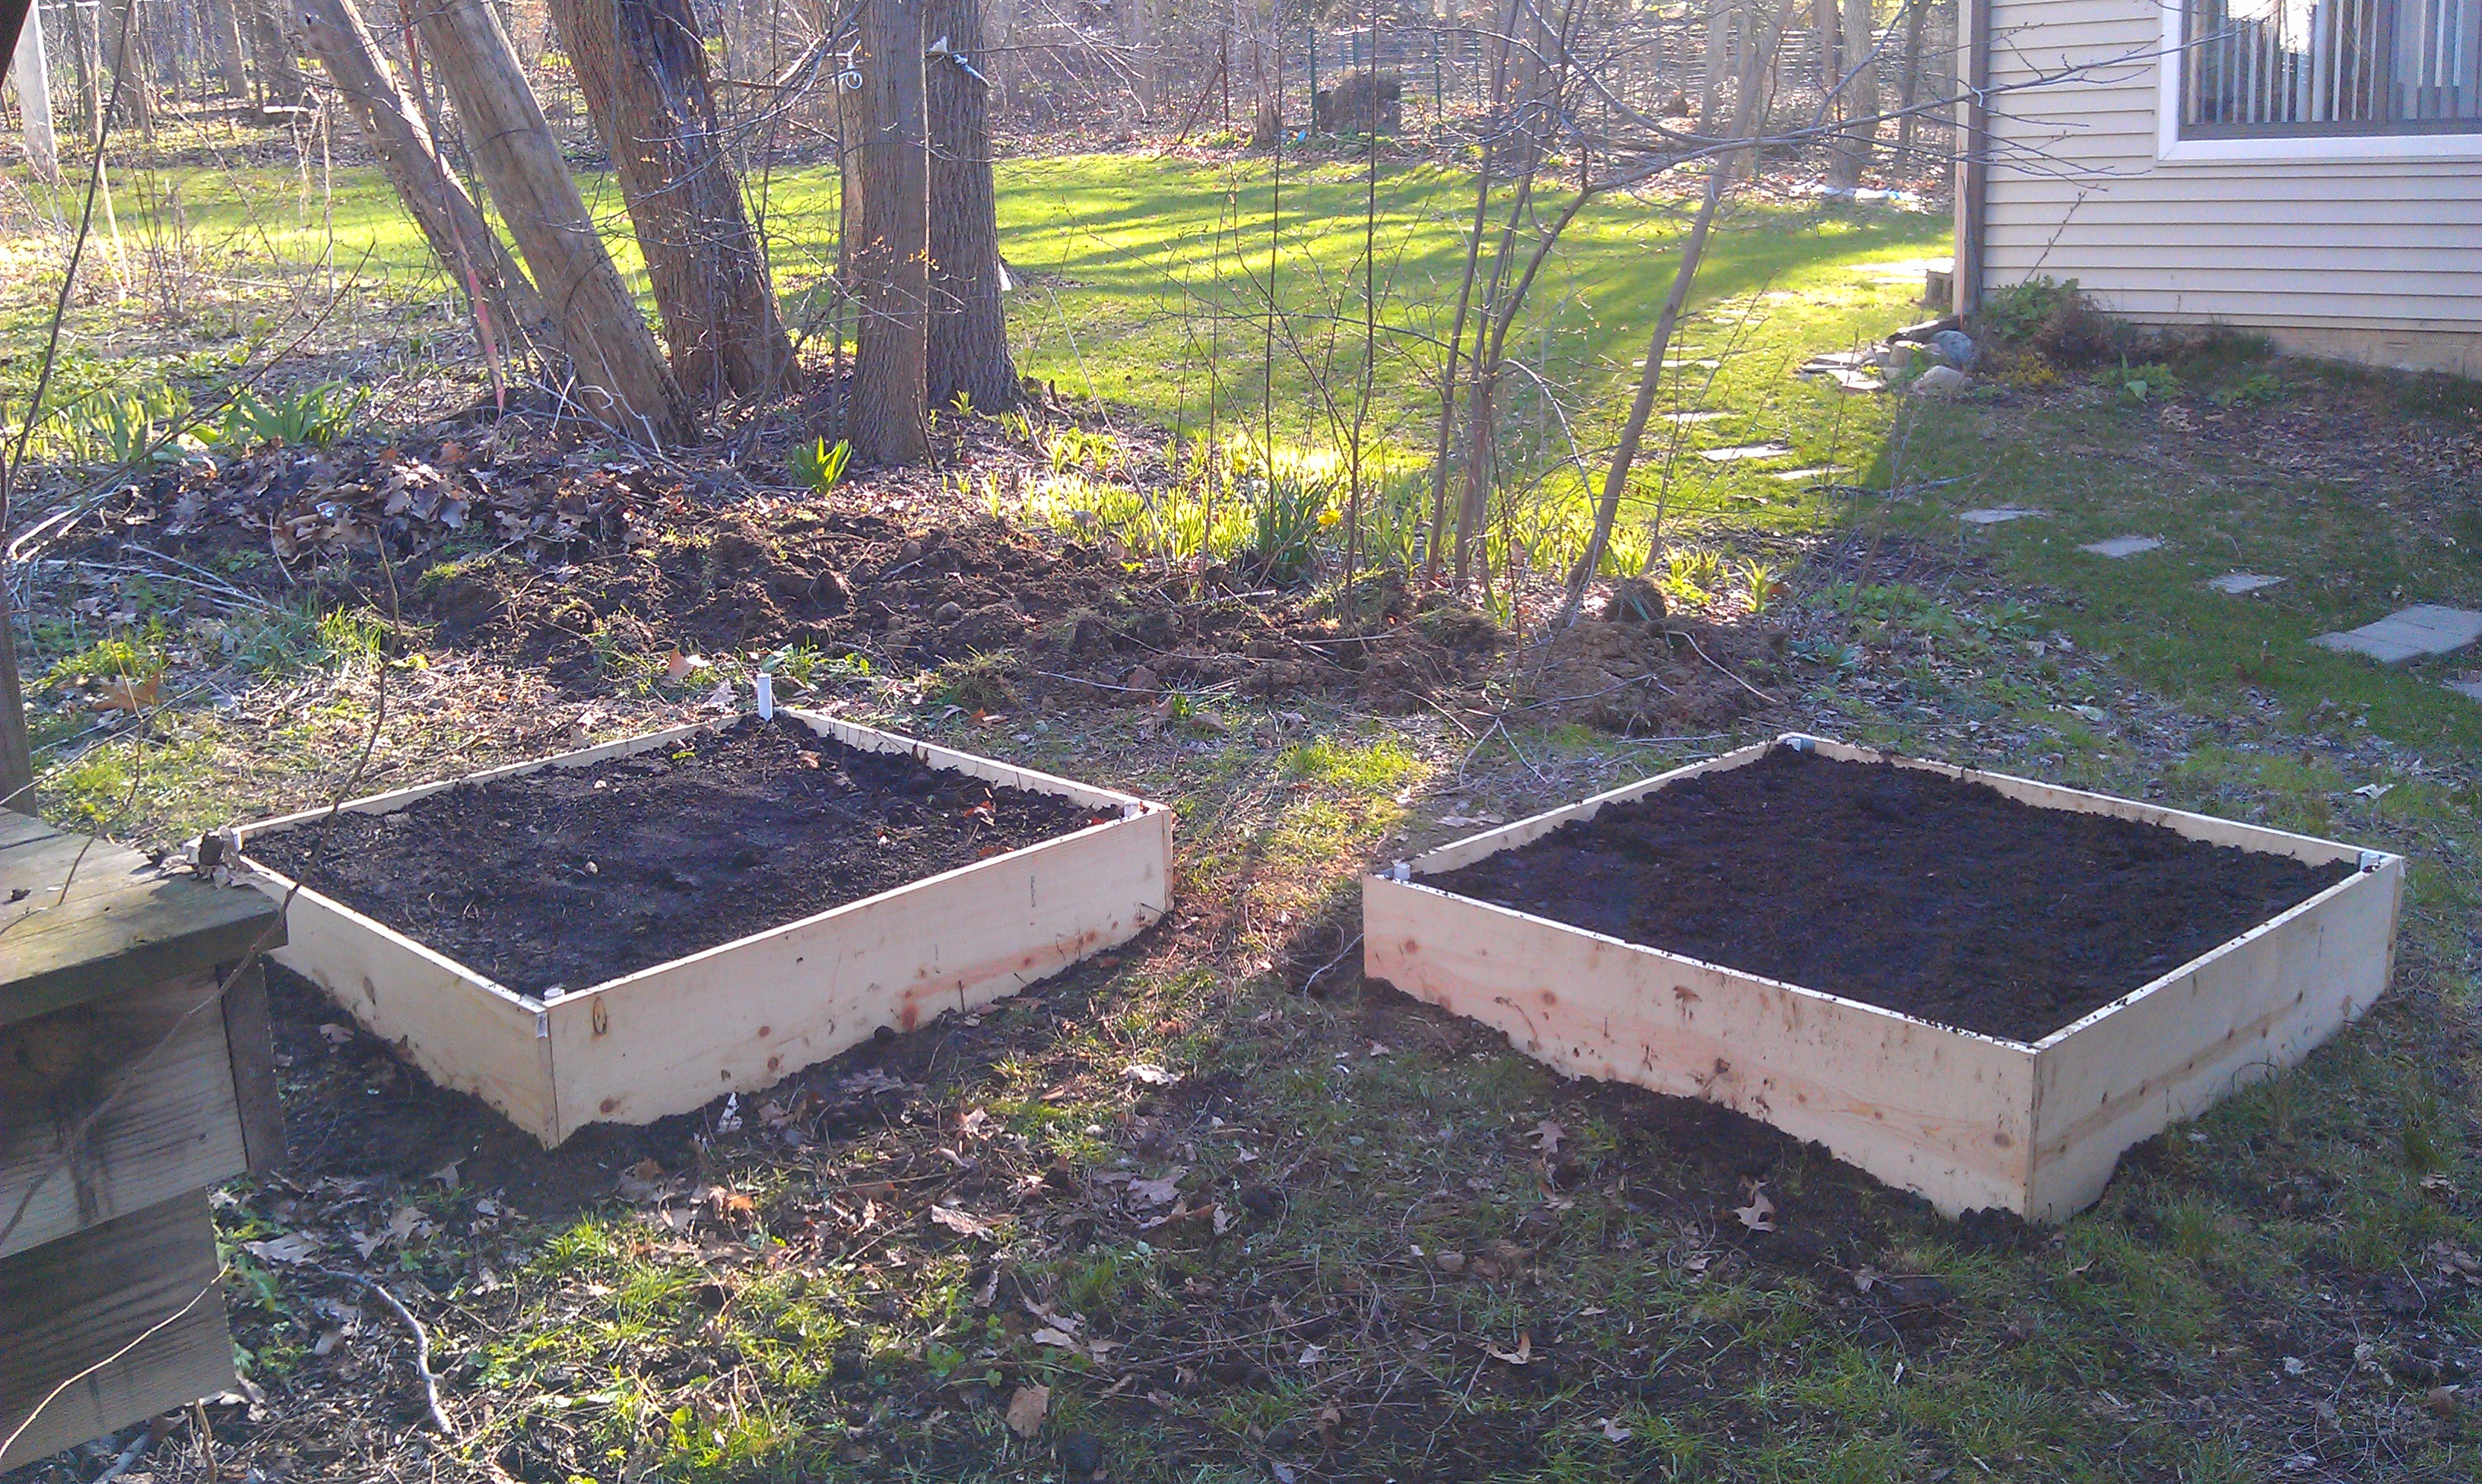
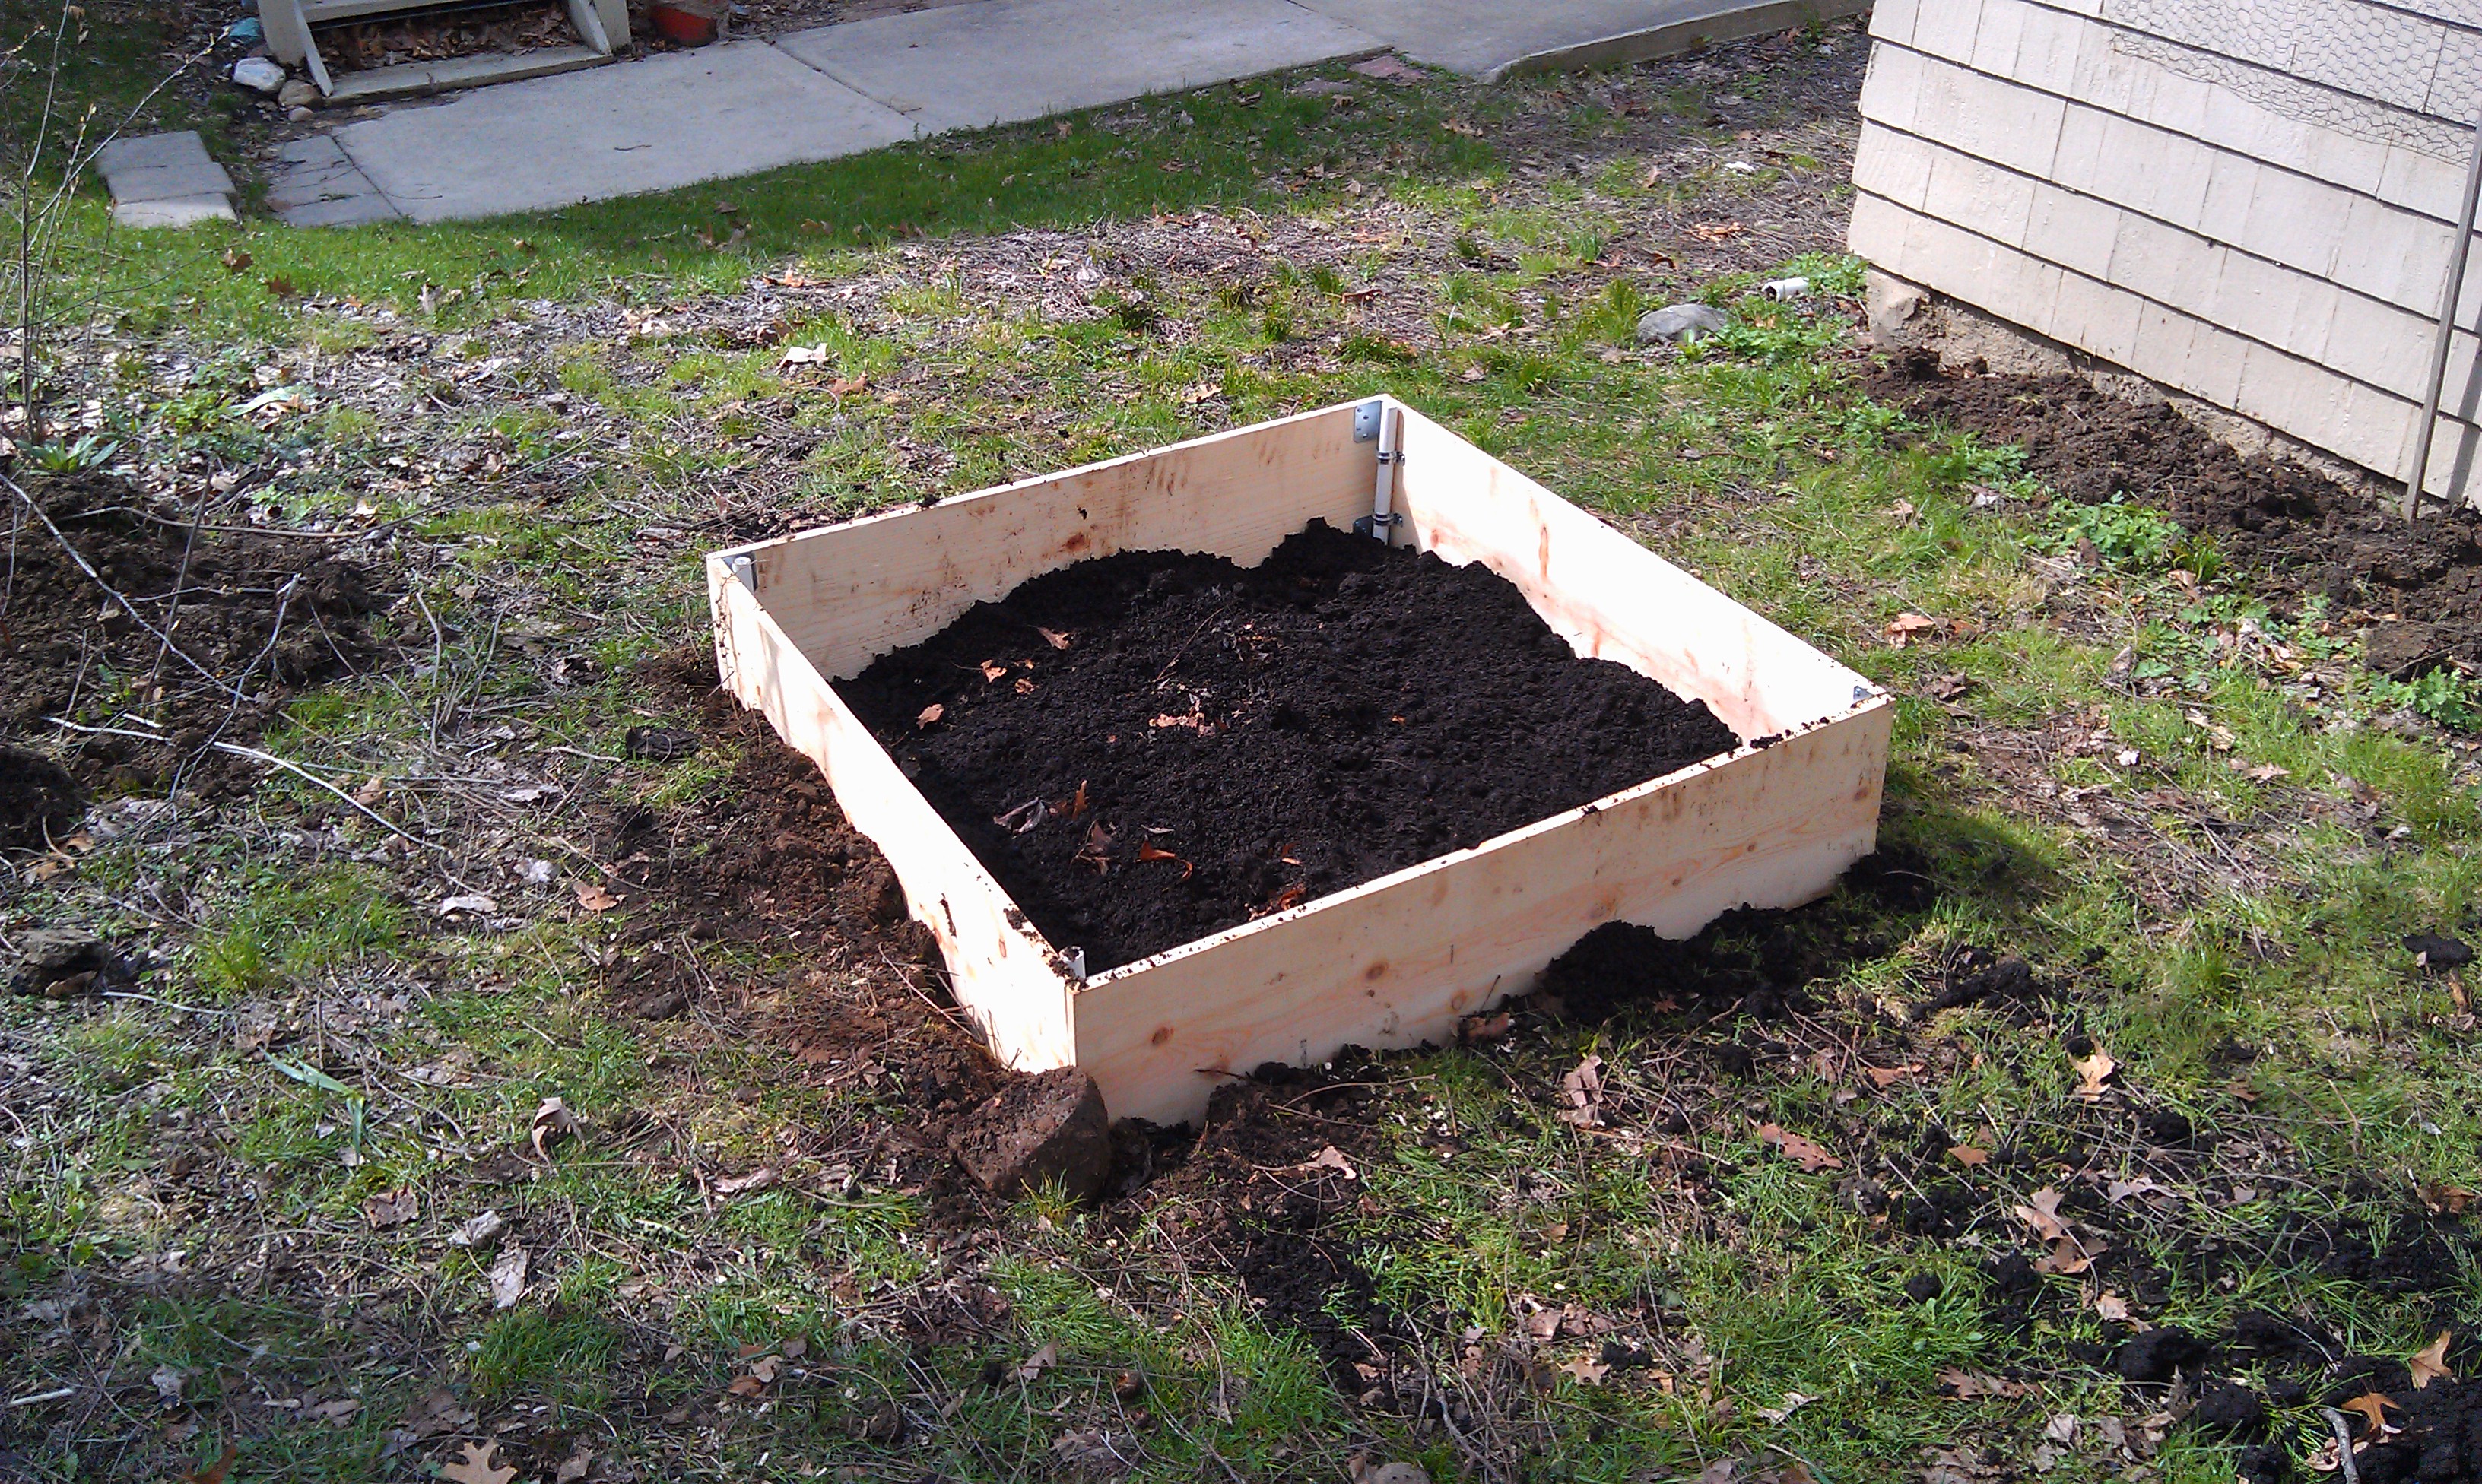
The finished product, two 4’x4′ raised beds.
The weather in Michigan was finally warming up so I decided it was time to build some garden beds. I had helped build raised beds in the past but I had never done it on my own. It ended up being a lot easier than I expected and I was able to build two of them over the weekend and still have time to go out.
My backyard is extremely small and a good portion of it is taken up by a platform and stairs that lead to the upstairs apartment. To make matters worse the yard is sloped and has a small wooded area with a few large trees that subdivide my yard from the neighbors. Since I had so little space to work with I opted to build two “square foot” style raised bed gardens. Square foot gardening is a methodology that has been around for almost 30 years and it provides great results in a limited amount of space. The addition of the raised beds helps to prevent soil compaction and generally make the garden a lot easier to maintain. Since my yard is sloped the beds also prevent my soil from running everywhere when it rains.
All told I spent just a little over $100 for all the parts to build the garden including the compost. I also built the beds in such a way that I could quickly add a trellis or hoop house depending on what I wanted to grow and the time of year by snapping the fixtures into some PVC pipe I placed at the corners of the beds. Here is the materials list to create a single raised bed.
- 4 12″x4’x1″ pre-sawn sections of untreated pine (~$6.50 each)
- 8 3″ 18Ga steel angle brackets (~$1.25 each)
- 1 50 count box of #8 3/4″ wood screws (~$4.65 each)
- 2 4 count packs of 1″ two hole pipe strap (~$1.29 each)
- 4 sections of 3/4″x24″ PVC Pipe (cheap)
Make sure you use untreated wood as treated wood can leech preservatives into the soil. I got all of this stuff at Home Depot and I was in and out in about 30 minutes.For the fill dirt I picked up a cubic yard of municipal compost from the city for only $21.20. The compost looks fantastic and I mixed with a bit of the fill dirts from the bed and some leaf litter from around the yard to fill up the beds completely. You will want a five gallon bucket to move it around as well as a tarp to put it on so it doesn’t run all over the yard.
To construct the beds I really quickly manufactured four “connector boards” where I placed the L brackets and pipe straps onto the board. I made sure to leave just enough space on these boards so I could get the drill to fit in the corners of the beds.
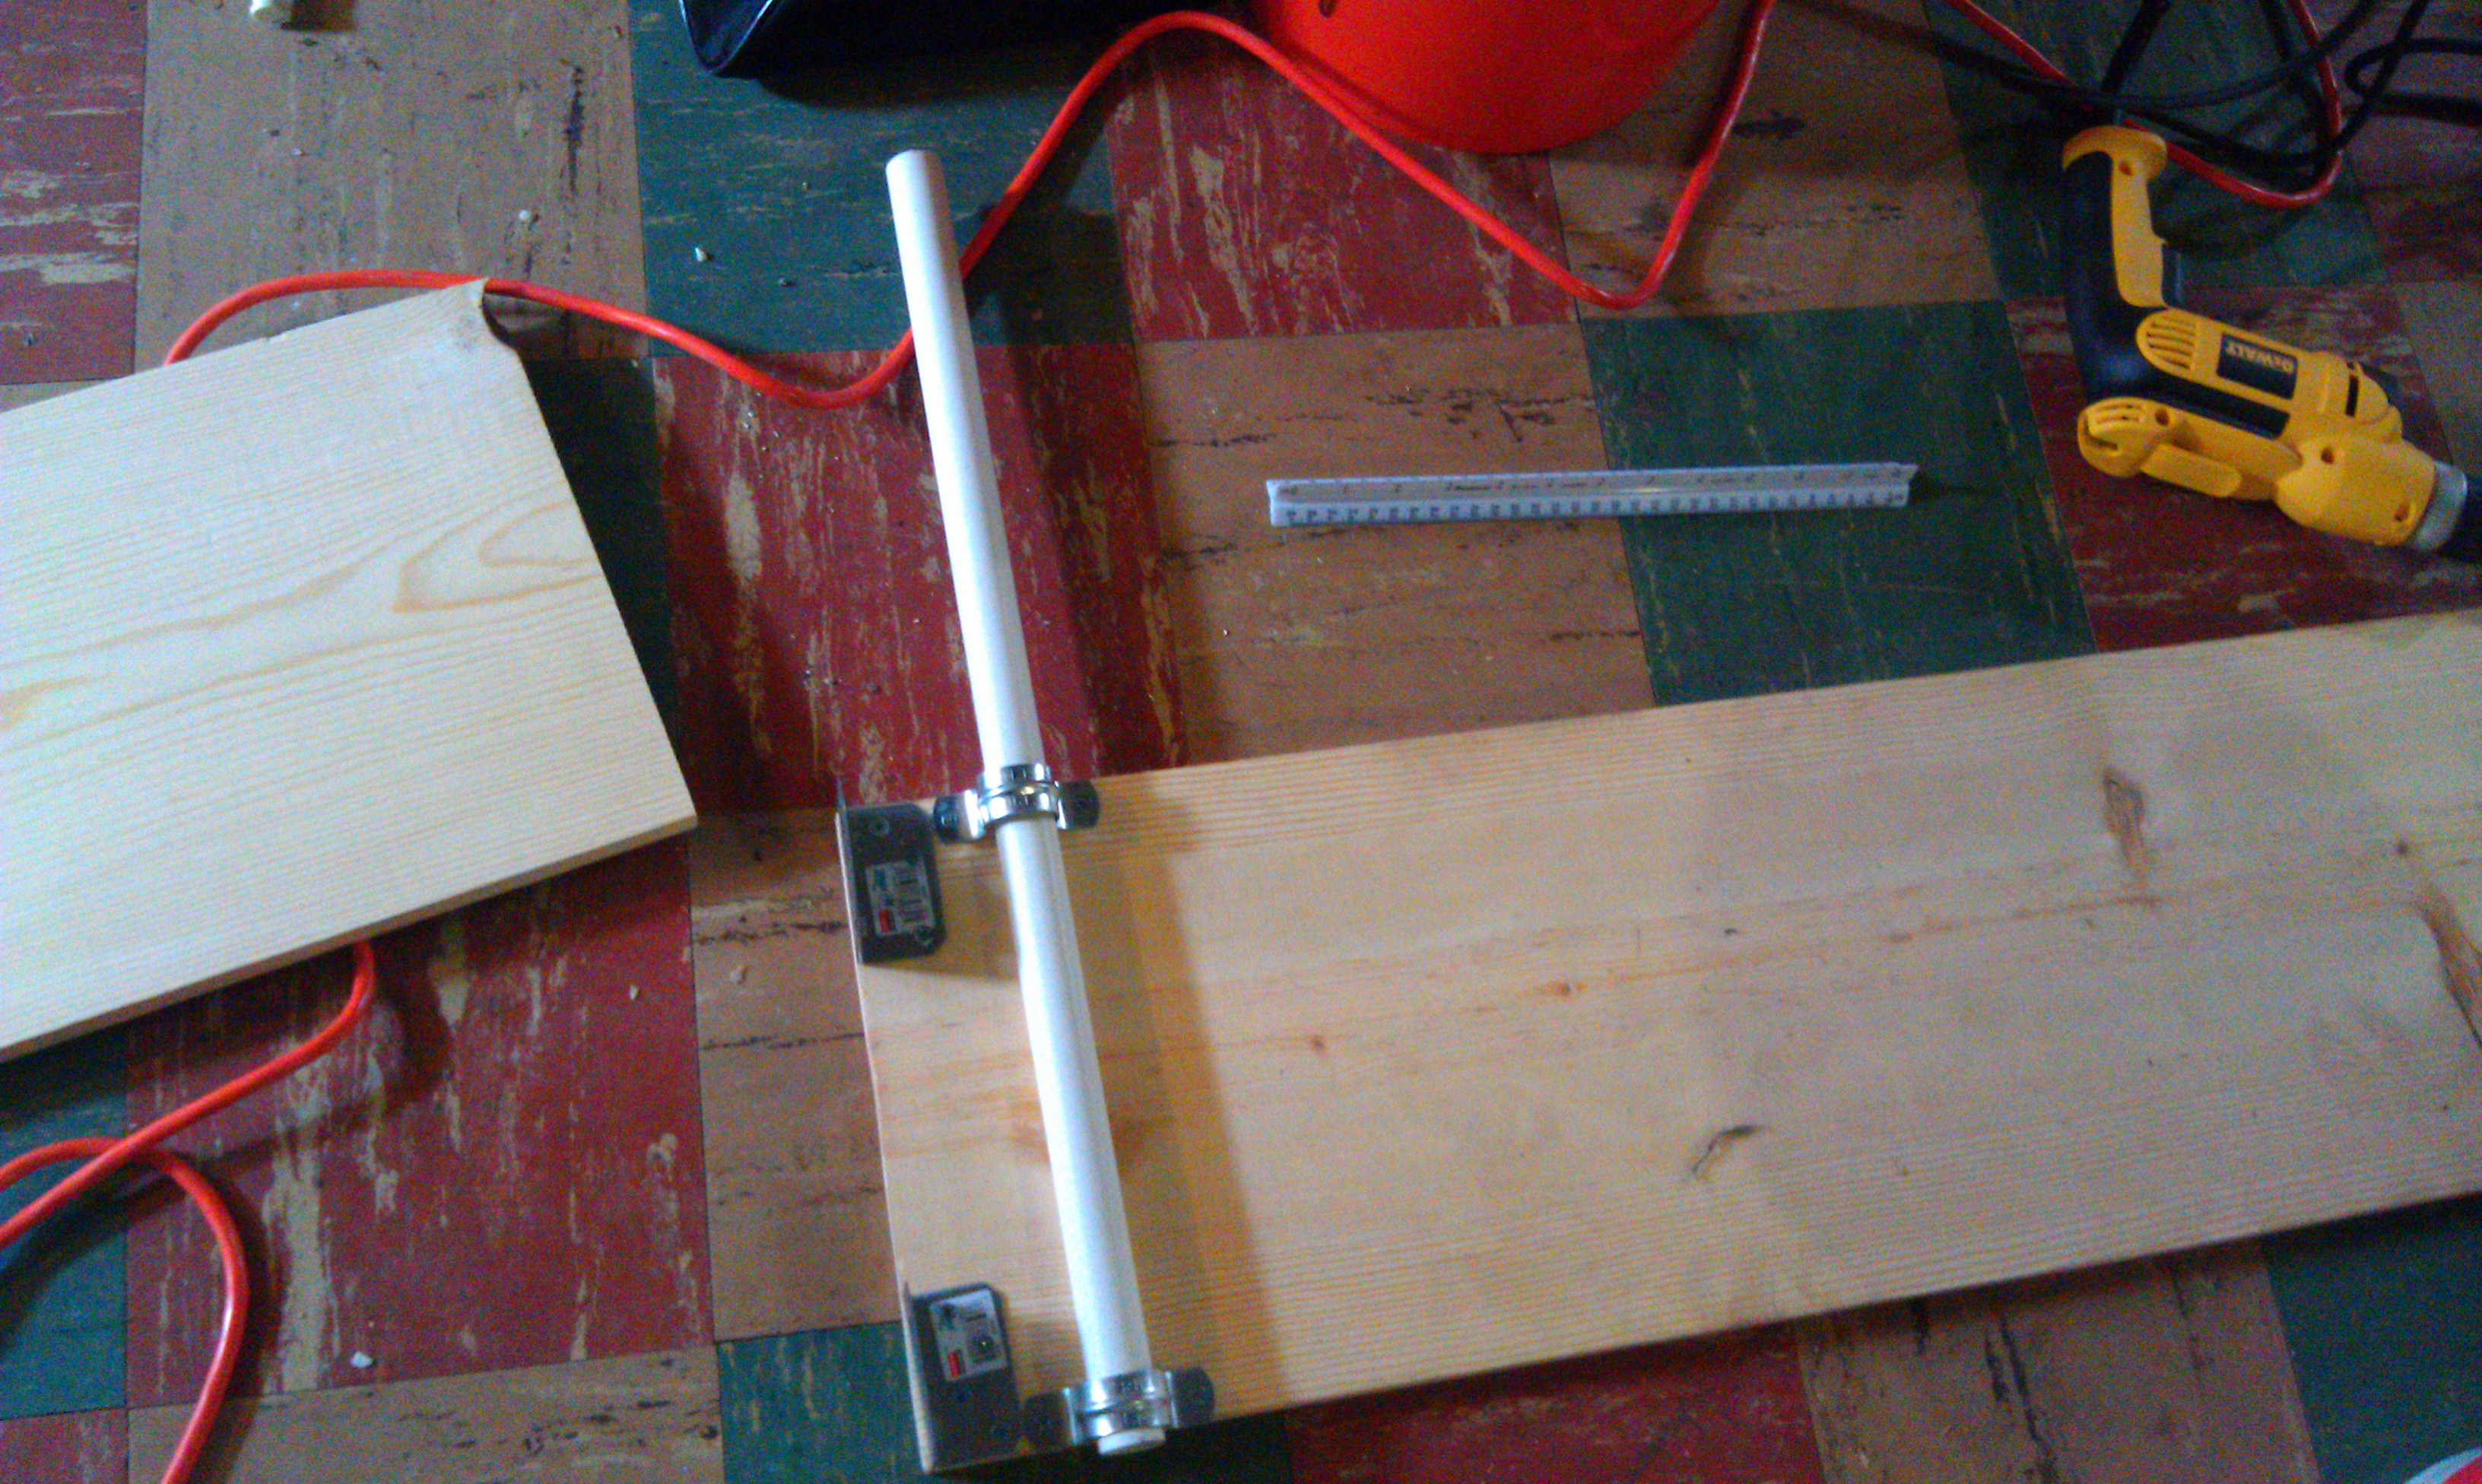
One side of the “connector” boards. Note the placement of the pipe straps to make it easier to screw everything together.
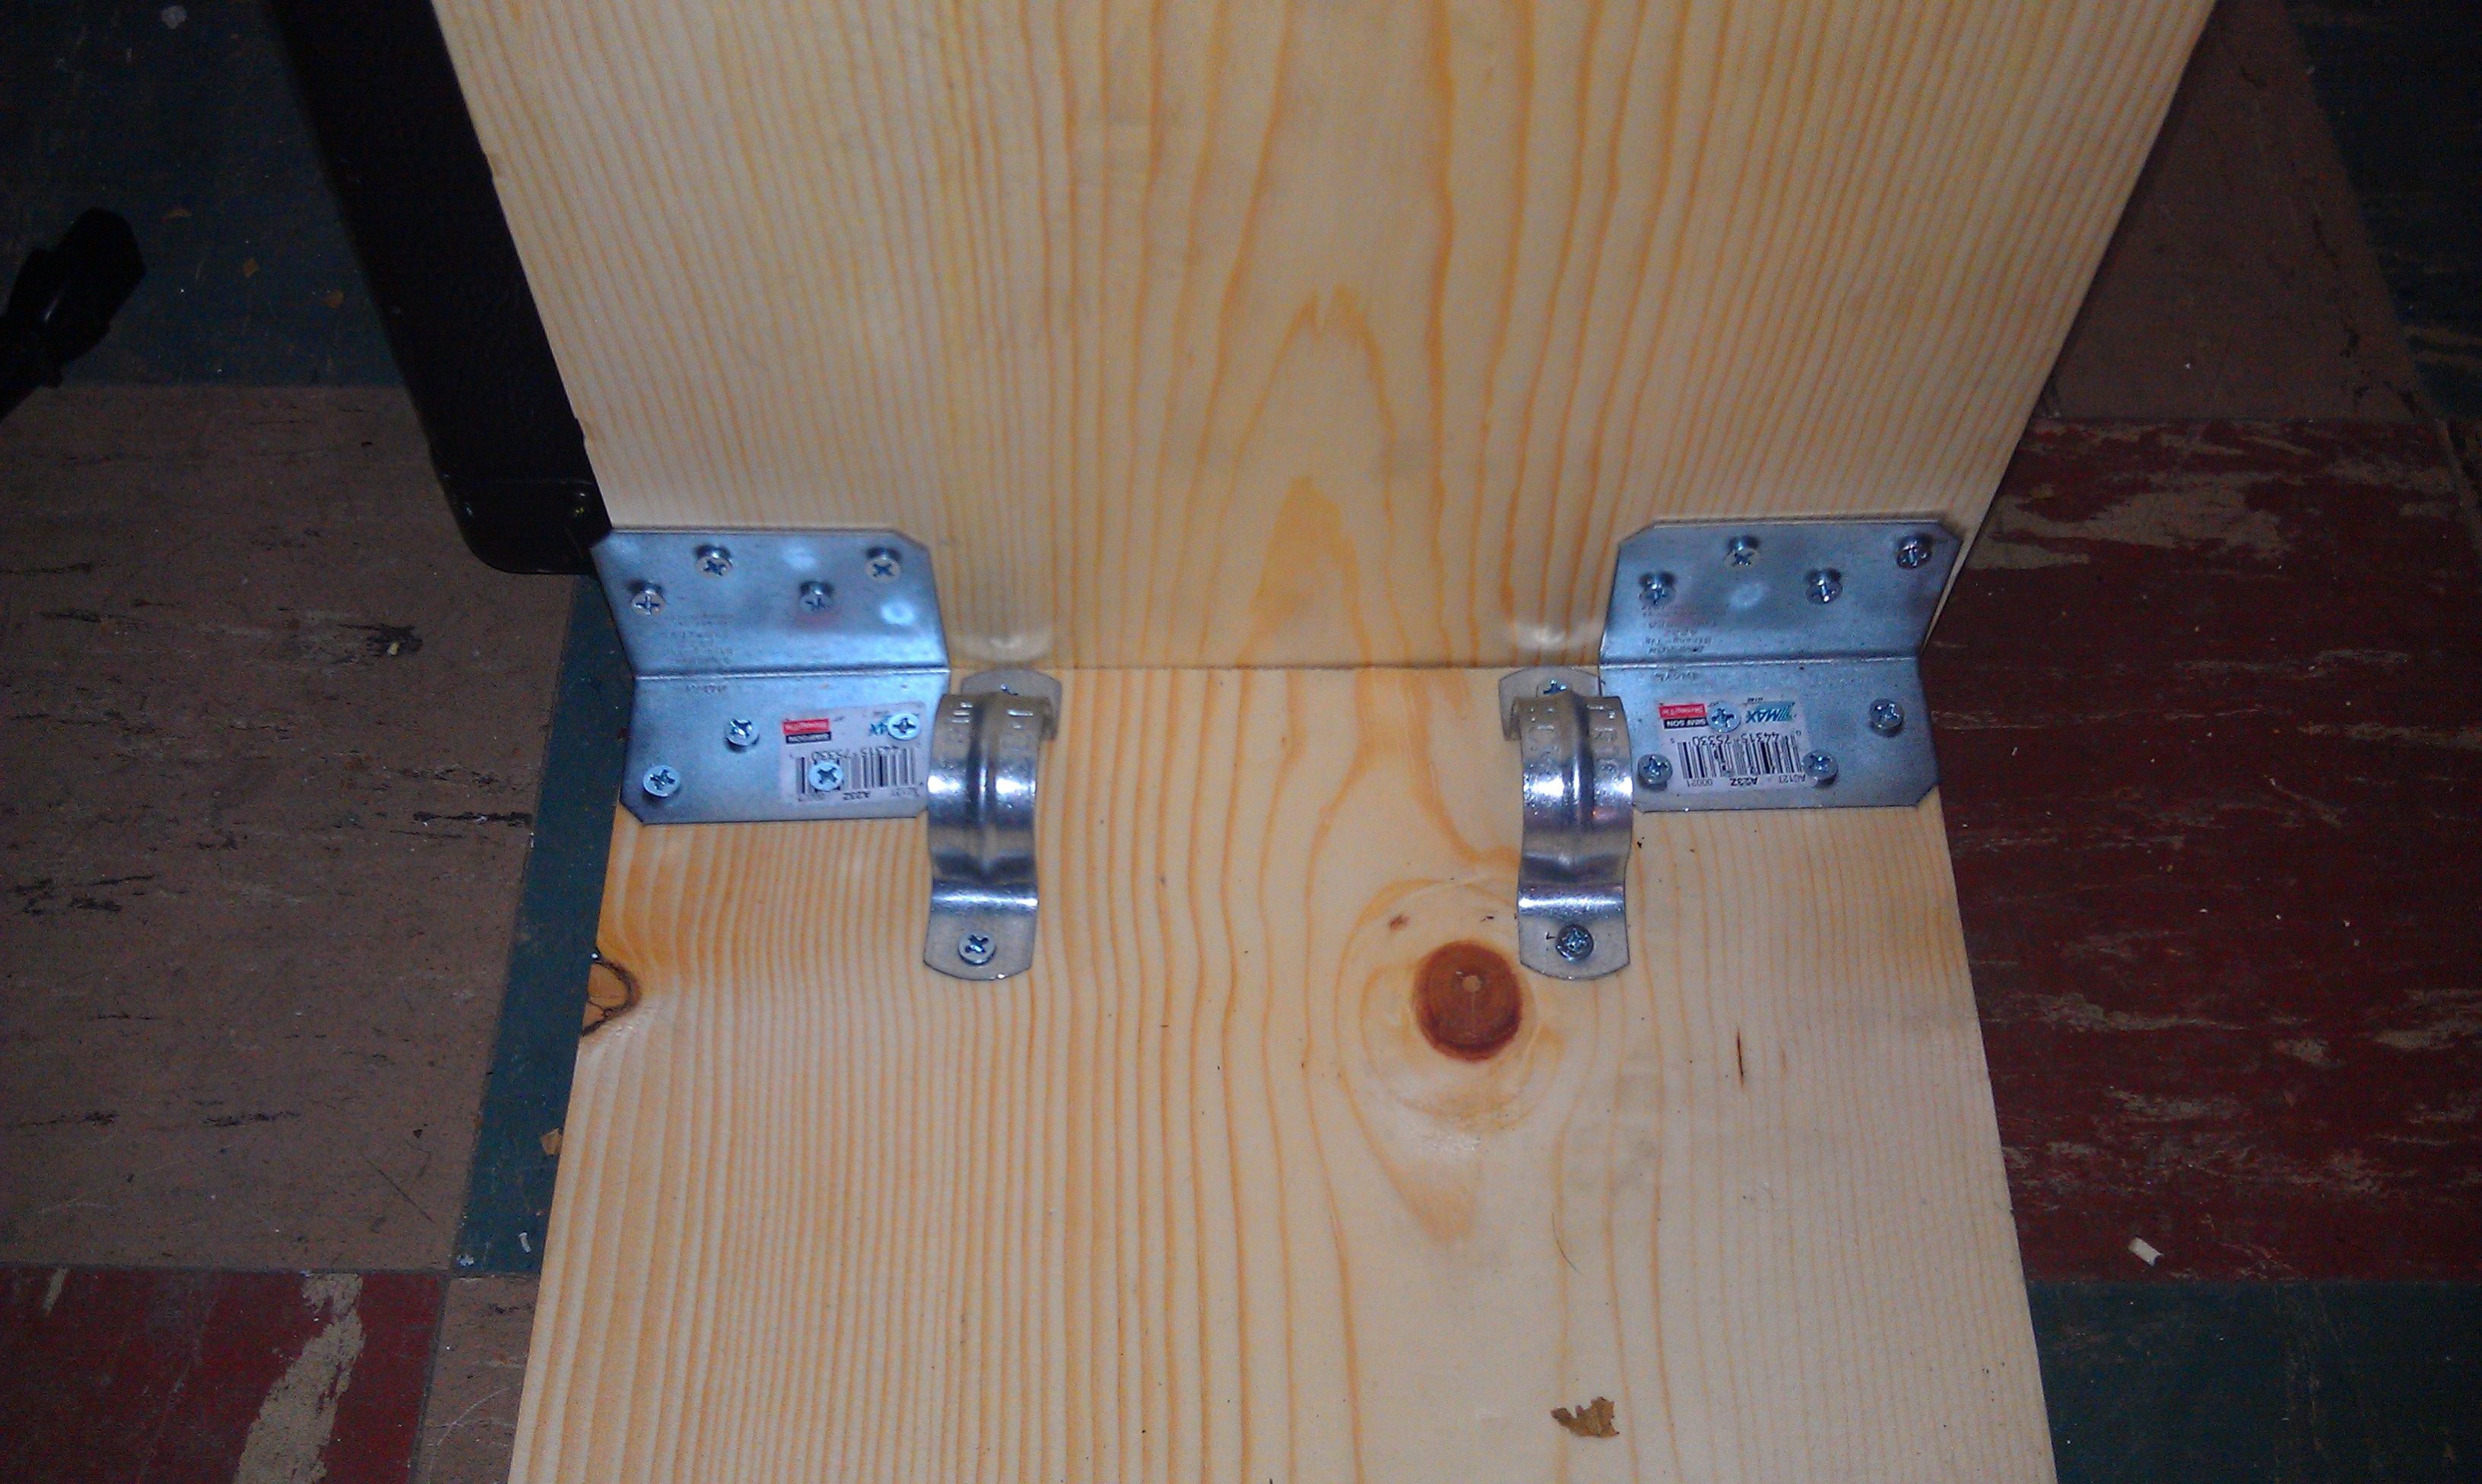
Once I finished my connector boards I then screwed each one onto a plain board to form four “L” shaped pieces. To do this I put the connector board on the floor up against a wall and then wedged a regular board behind it.
Once I finished the “L” sections I took the whole thing outside and used some cinder blocks to hold everything in place while screwed the sections together. I then started digging out the beds. I wanted each bed to sit level on the sloped yard so I dug out sections that were more or less flat. I had to make the holes slightly larger than the beds. I used rocks that I found while digging to help prop up the corners and provide some extra drainage. Once the beds were in placed I filled out the outer edge with dirt to secure everything, and then I used the flat side of my shovel to drive the PVC pipe into the ground a foot below the beds. This should keep the beds in places. If I decide I want to build out hoop houses or trellises I can remove the pipes and replace them with suitable materials.
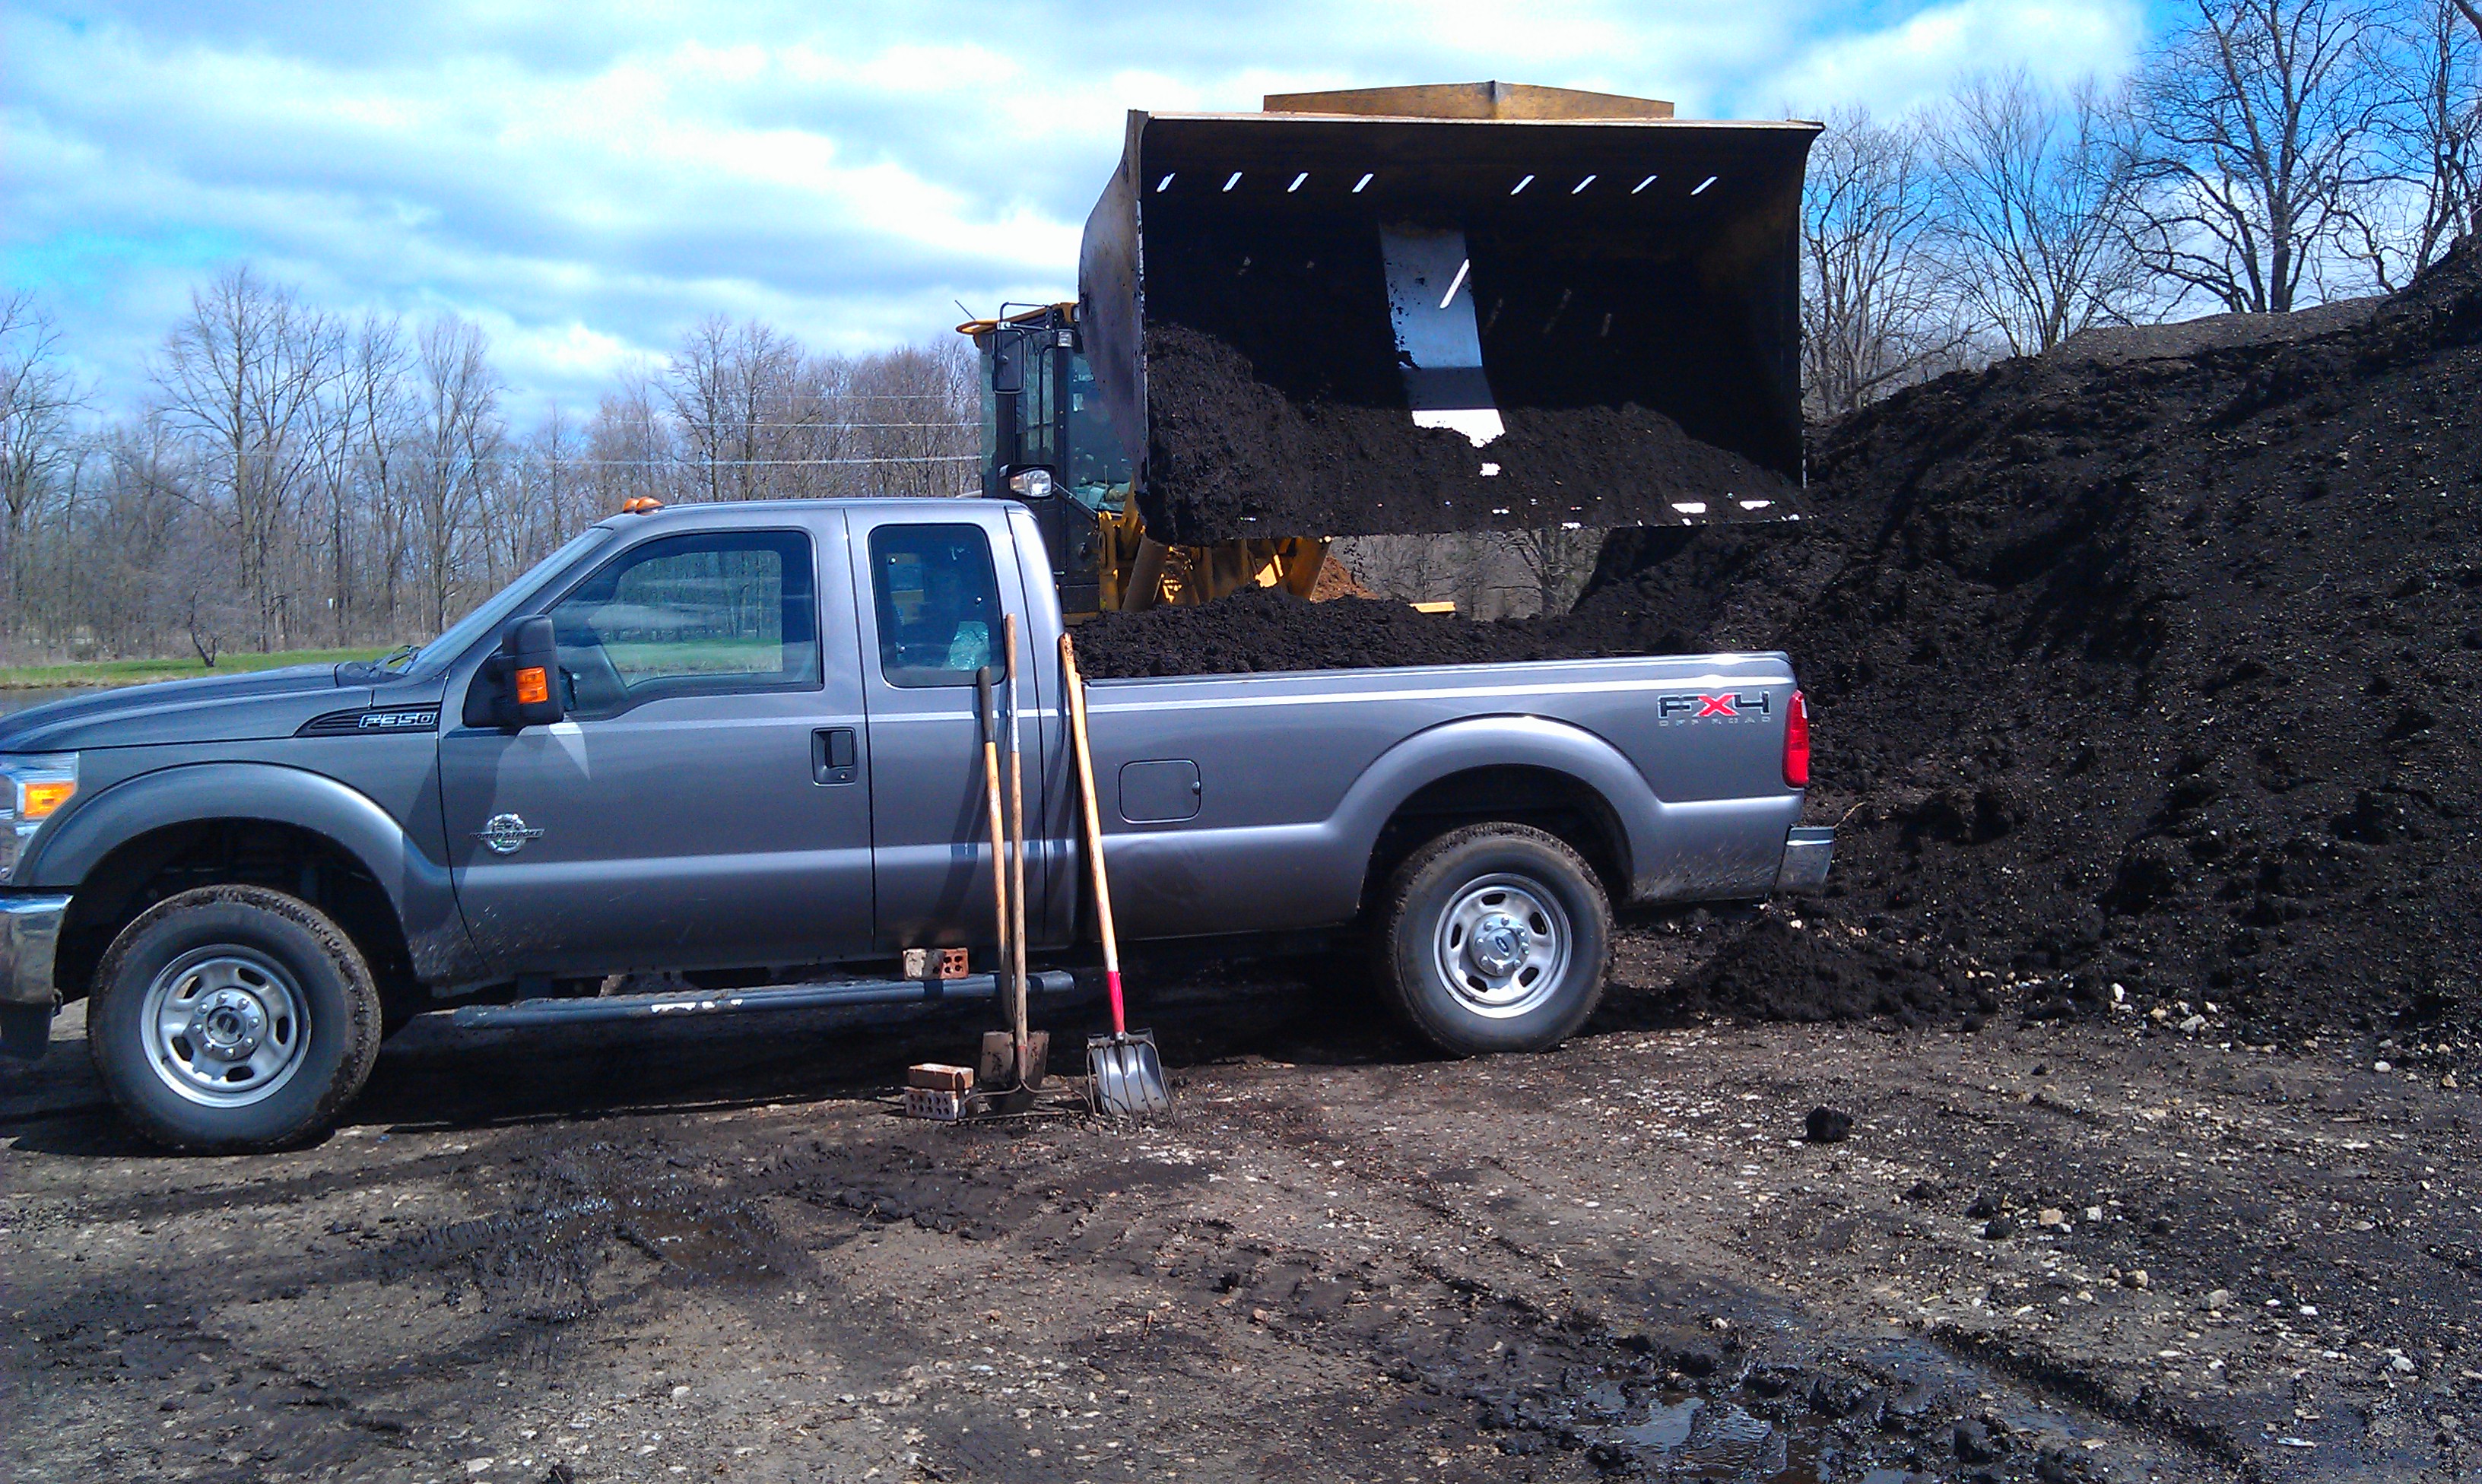
I then proceeded to fill up the raised beds with the compost I got from the city. Residents of Ann Arbor can get a free cubic yard of compost every year from the waste center, I opted to have mine dumped into the back of my friend Joe’s truck which cost $21 but it was money well spent.
Getting compost from the city of Ann Arbor Compost Center.
It took me almost three hours of shoveling and filling up five gallon buckets to fill the beds. It was back breaking work and I need a long hot bath afterwards but it was well worth it. I just picked up most of my seed from Downtown Home and Garden. They sell seed for most of the common garden vegetables in bulk so it is a lot cheaper. I also ordered some heirloom tomato and pepper seedling from the Project Grow plant sale. I had a Project Grow community garden plot for five years and it is worth noting that all of the proceeds from the sale go directly to Project Grow. This is my current sketch for what I am going to grow in my beds. As with any landscaping project it is helpful to plan your layout first to take into account lighting and watering contraints as well as views. I will post pictures as soon as I get everything in and sprouting.
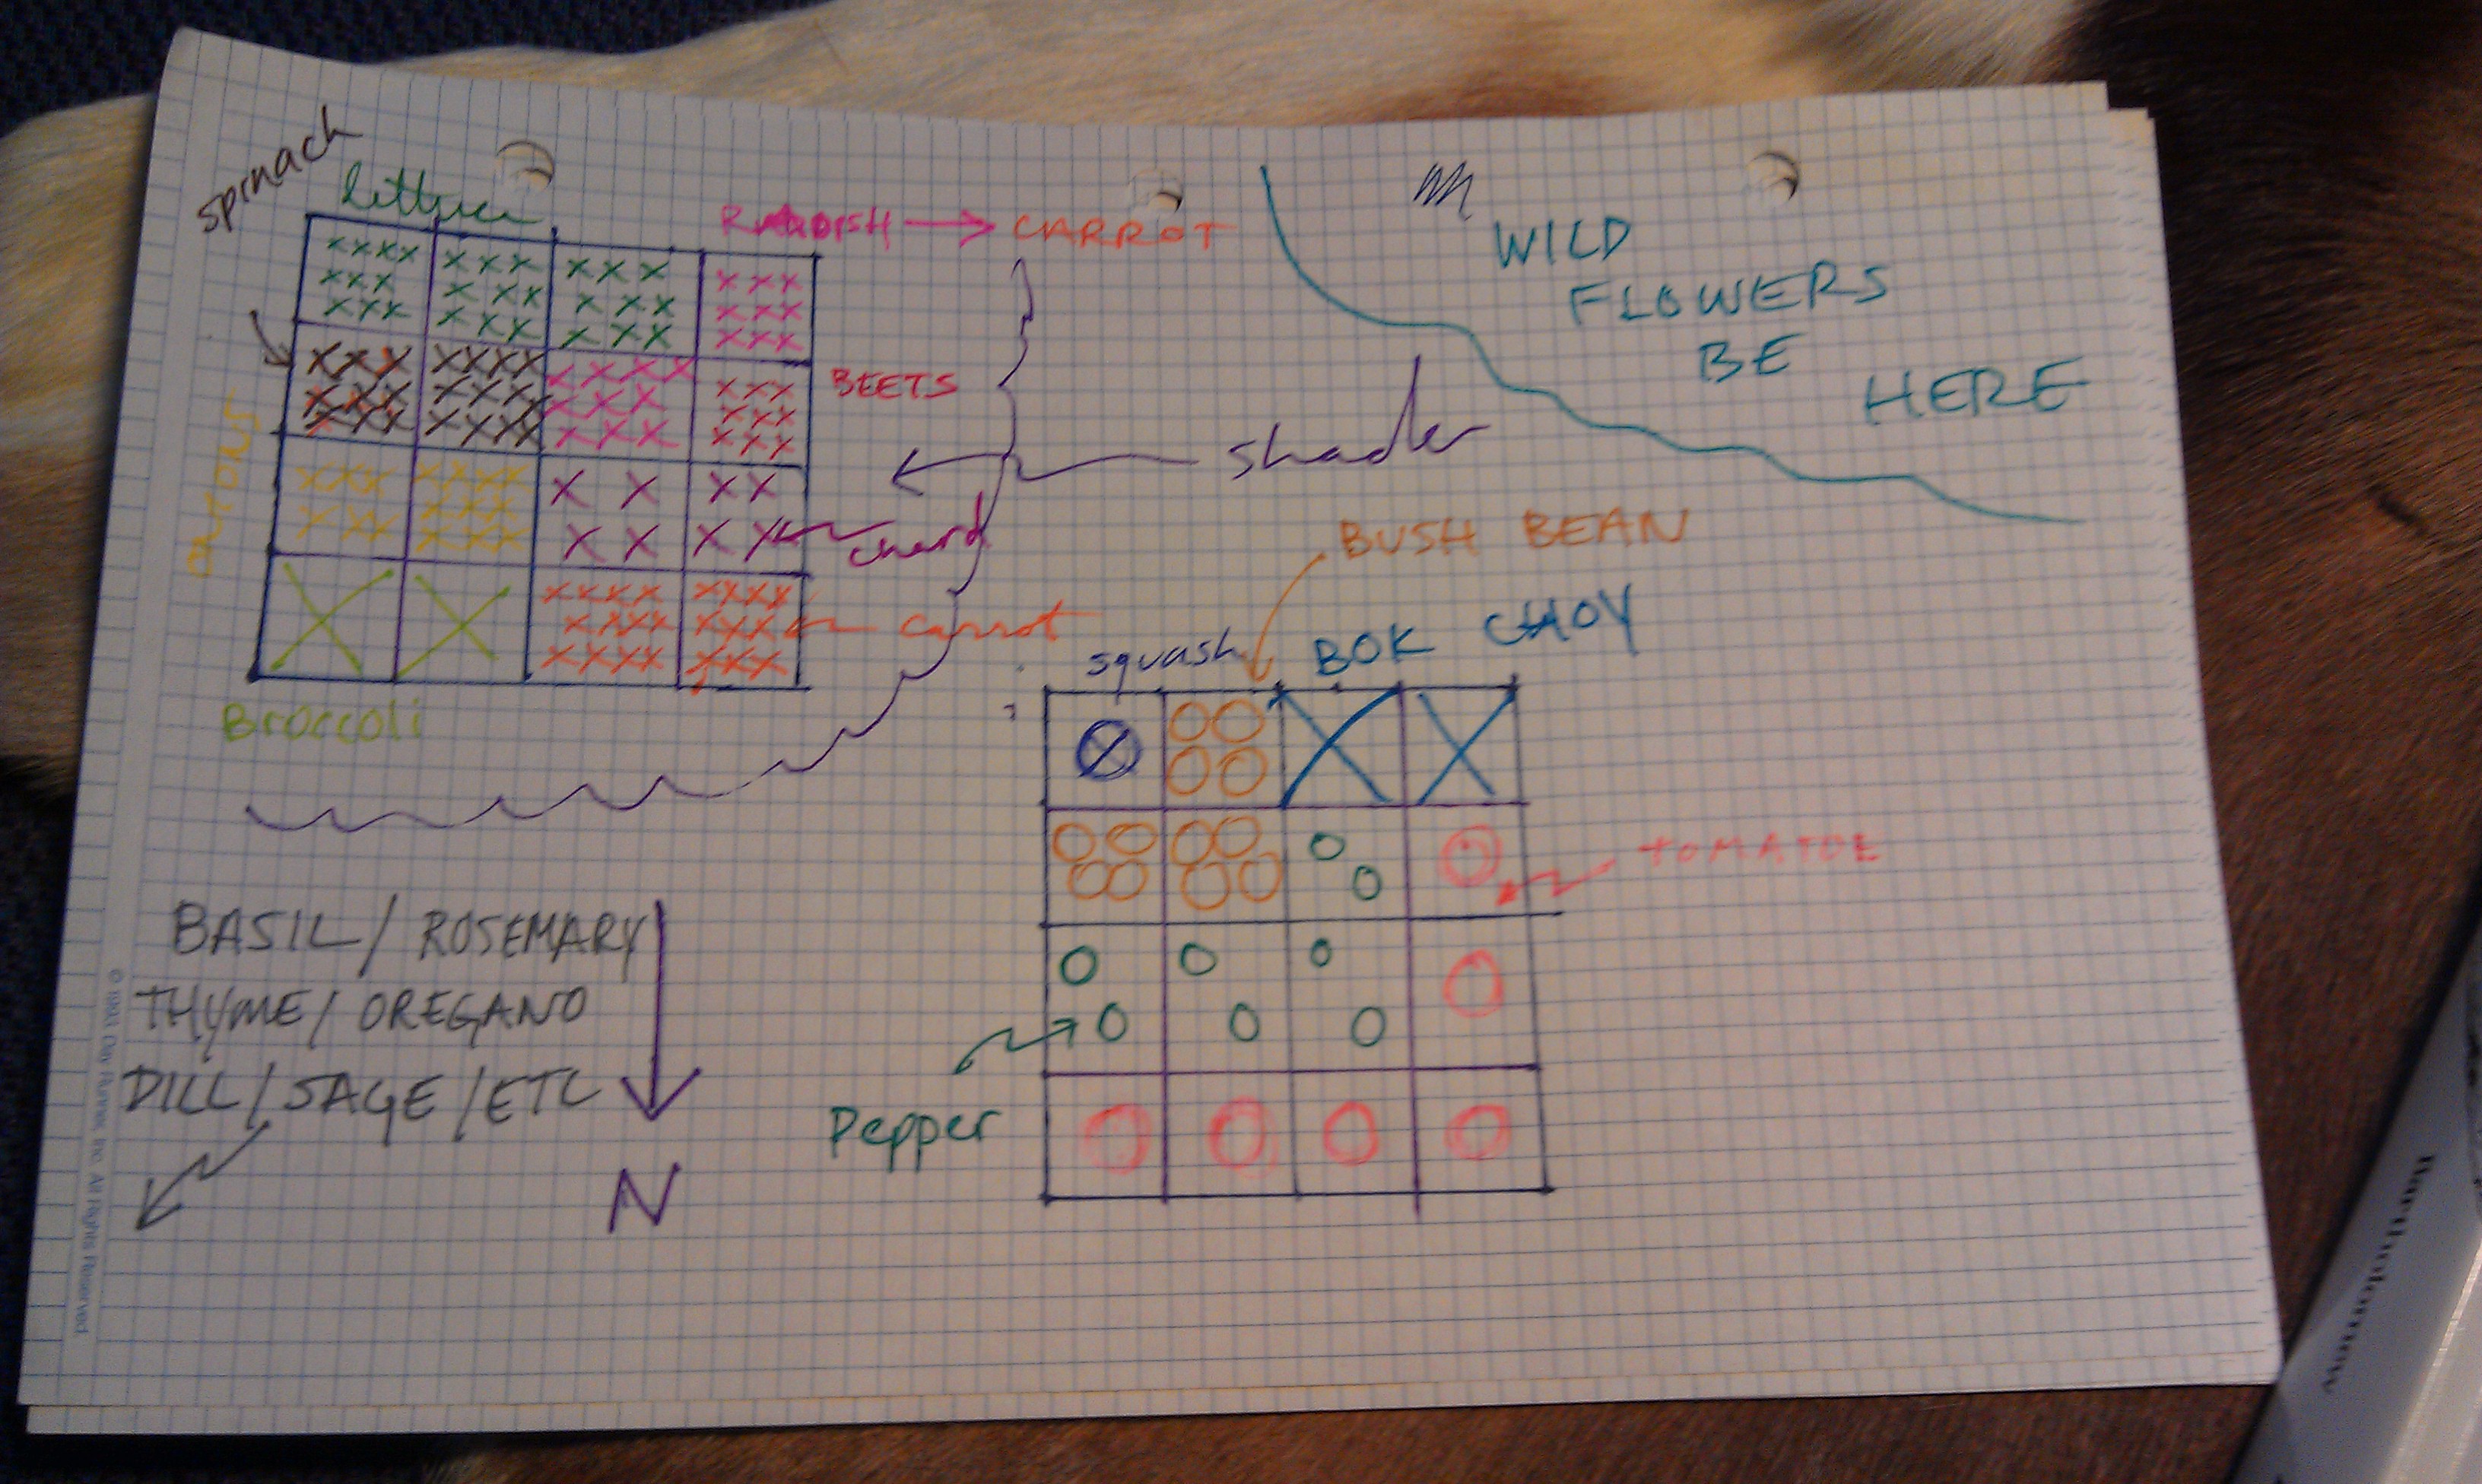
My tentative garden layout.